 Rating
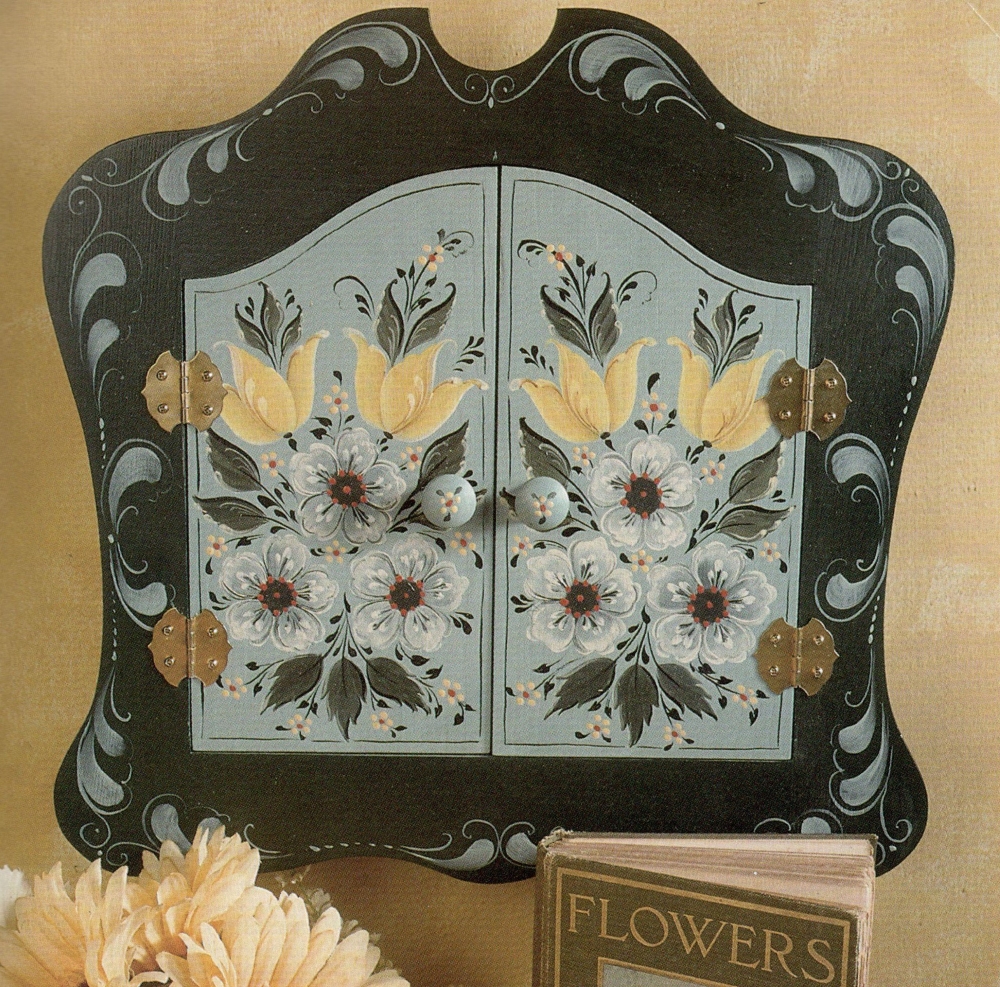
Medium: acrylic gouache on wood
Materials
R & M What Knots key box (12” x 121/4” x 2 /12′” No. M94-5
Jo Sonja’s Artists’ Colors
- Brushes: Loew-Cornell Series 7500 No. 4 filbert. Series 7000 No. 2 round, and Series JS No. 2 liner
- Sandpaper
- Tack cloth
- Jo Sonja’s All Purpose Sealer For Wood, Metal, Glass
- Tracing paper
- Transfer paper
- Stylus
- Jo Sonja’s Retarder & Antiquing Medium
- Jo Sonja’s Clear Glazing Medium
- Palette
- Jo Sonja’s Polyurethane Water Based Varnish
Preparation
Step 1. Note: The key box comes fully assembled—take apart before starting. Sand entire surface and wipe sanding dust with the tack cloth. Mix sealer with FG and base in dark green areas. Add sealer to SP + FG (5:1) and base in light green areas. Allow to dry.
Step 2. Sand again and wipe away sanding dust. Apply a second coat of the appropriate color of paint without adding any sealer to the paint.
Step 3. Trace pattern onto tracing paper and transfer onto surface using the stylus.
Mixtures
Mix 1 =SB + GO (3:1) Mix 2 = Mix 1 + RS (1:1) Mix 3 = TY + SP (1:1) Mix 4 = Mix 3 + SP (1:1)
Palette
| Jo Sonja’s Artist's Carbon | Abbreviation |
|---|---|
| Carbon Black | CB |
| Forest Green | FG |
| Gold Oxide | GO |
| Norwegian Orange | NO |
| Raw Sienna | RS |
| Smoked Pearl | SP |
| Storm Blue | SB |
| Turners Yellow | TY |
| Warm White | WW |
Painting
 Step 1. Large leaves. Load the No. 4 filbert with Mix 2 and fill in each leaf by starting on the long side and using “S” strokes. As you move to the lighter side of the leaf, pick up RS for each stroke to lighten as you work toward that side of the leaf. Blend strokes together by brushing lightly over them. Brush mix Mix 1 + CB and make dark over-strokes on the “S” side of the leaf. Place three rosemaling teardrops along the scalloped side of the leaf using Mix 4. The three strokes on each of these leaves are completed by carefully loading the No. 2 liner with Mix 4, and then tipping it into Mix 2 to pull in a bit of the green.
Step 2. Pullout flower. Pick up Mix 1 + retarder and dab into the center of the flower (use plenty of paint and have it wet enough so it doesn’t dry too quickly). While still wet, load the No. 4 filbert with SP, touch tip of brush into edge of the green in the center, and start pulling out to edge of petal. Repeat to fill in petal and to blend slightly, then move to next petal. Make sure green in center is wet enough to partially pull out into petal. Freshen paint, if necessary. When petals are filled in, make “C” strokes along side of each petal and across the top with WW. Load the No. 2 round with SP and then tip lightly into green to complete the rosemaling teardrop strokes on each petal. Place NO dots at the bottom intersection of each pair of petals and a dot at the center point of each petal to form a circle.
Step 3. Tulips. Start with the side petals. Load the filbert or round brush with Mix 3 and sideload with WW. Start on the outer edge of the petal and make an “S” stroke from the outer point toward the base of the tulip. Pick up more of Mix 3 and blend on the palette, then sideload with RS and blend on the palette again. Make a smaller stroke for the inner edge of the side stroke, keeping the RS side toward the center. Blend
the two strokes together slightly. Repeat for the other side petal. For the center, load the brush with Mix 3 + RS and make an “S” stroke from the outer end toward the base. Pick up more of Mix 3, blend on palette, and then make a second stroke. Using the same brush, pick up a little WW and make the third stroke on the lighter side. Blend these strokes slightly together. Paint over-strokes using Mix 4 + CB, tipping brush lightly into RS.
Step 4. Dot flowers. Using the stylus or wooden end of the brush, add a drop of clear glazing medium to NO to dot center and a drop to Mix 3 to dot petals.
Step 5. Use Mix 1 to paint the
stems, small heart-shaped leaves (two teardrops side by side), and accessory strokes. Using the same mix, paint line-work around door approximately 1/4” from the edge.
Step 6. Complete strokework on outer part of box using SP + FG. Allow entire surface to dry.
Finishing
Apply a coat of the clear glazing medium to surface. Allow to dry, and then finish with several coats of varnish.
Leave a Comment