
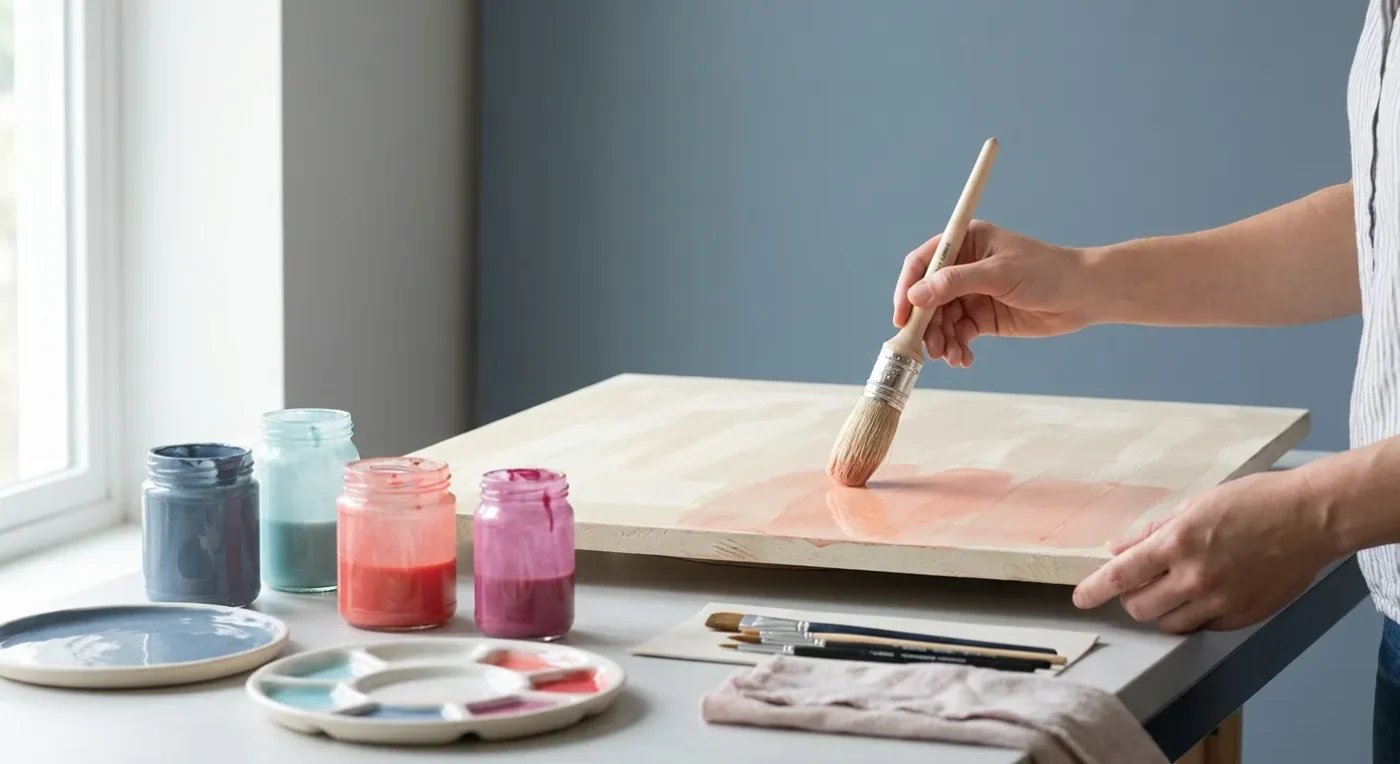

Glazing is a revered technique in decorative painting that can elevate your artwork from flat and opaque to luminous and deeply dimensional. Mastering glazing techniques involves applying thin, transparent layers of color over a dried painted surface, allowing the underlying colors to show through and create optical mixtures. This process adds incredible richness, subtle color shifts, and a sense of depth that is difficult to achieve with opaque paint alone. It’s a skill that, once understood, becomes an indispensable tool in your artistic repertoire.
The Fundamentals of Mastering Glazing Techniques
At its core, glazing relies on transparency. To create a glaze, you mix a small amount of paint with a larger proportion of a transparent medium, such as a glazing liquid or even watered-down acrylic medium. The key is to make the mixture thin enough to be transparent but still hold its color. Apply these glazes in very thin, even coats over a dry base layer. Each subsequent layer builds upon the last, creating optical blends and a richness that opaque paint cannot replicate. For instance, a thin blue glaze over a dry yellow base will create a vibrant green, but with a luminosity that feels different from mixing green directly on a palette. Experiment with different color combinations; a warm glaze over a cool base can create a beautiful glow, while repeated layers of the same color can deepen its intensity without making it muddy.
Choosing the Right Glazing Mediums
Selecting the appropriate glazing medium is crucial for successful results. Acrylic glazing liquid, for example, extends drying time, allowing more time for blending. Oil-based mediums offer a longer open time, which is beneficial for complex layering. Consider your chosen paint type and the effect you wish to achieve. Many artists also experiment with homemade mediums, combining water, flow improvers, and acrylic binder. It is important to remember that the medium should enhance, not dilute, the pigment’s intensity. Furthermore, always read the manufacturer’s instructions for any commercial glazing medium to ensure proper use and compatibility with your paints. This careful selection is a key aspect of truly mastering glazing techniques.
Preparing Your Surface for Glazing
Proper surface preparation is fundamental before you begin glazing. Your underlying paint layers must be completely dry. Applying a glaze over wet or tacky paint can lift the previous layers, leading to a muddy or uneven finish. Ensure your surface is clean and free of dust or oils, which can prevent the glaze from adhering properly. A smooth, well-prepared surface allows the transparent layers to truly shine. For decorative artists, a sealed surface often provides the best foundation for subsequent glaze applications. Consequently, artists often apply a clear sealant before beginning their glazing process to protect previous layers.
Achieving Luminous Depth and Subtle Shifts
To achieve true luminosity and depth, consider the sequence of your glazes. Lighter glazes over darker areas can soften edges and create atmospheric effects, while darker glazes can deepen shadows and enhance contours. Work in multiple thin layers, allowing each layer to dry completely before applying the next. This prevents lifting the previous paint and allows the colors to build gradually. You can also use glazes to unify disparate areas of a painting or to introduce subtle color shifts that create a sense of movement or light. For example, a warm amber glaze over an entire piece can give it a vintage, aged appearance, while a cool blue glaze can suggest distance or shadow. The beauty of mastering glazing techniques lies in its versatility and the subtle control it offers, enabling you to add a sophisticated finish to any decorative painting project, from intricate folk art to large-scale murals.
Layering for Optical Blending
The magic of glazing truly appears in the layering process. Each transparent layer interacts with the colors beneath it, creating an optical blend that is much richer than simply mixing colors on your palette. Consider applying a transparent red over a dry yellow base; the result is a vibrant orange that seems to glow from within. Conversely, a cool blue over a warm brown can create intriguing shadows with subtle purple undertones. This method allows for nuanced color transitions and a sense of depth that is difficult to replicate with opaque paints. Moreover, the thinness of the layers ensures that the light can penetrate and reflect off the underlying colors, contributing to the luminous effect. This careful layering is central to mastering glazing techniques effectively.
Controlling Transparency and Opacity
While glazing primarily focuses on transparency, understanding how to control the degree of transparency is also vital. You can adjust the ratio of paint to medium to create more opaque glazes for stronger color impact, or thinner, more transparent glazes for subtle shifts. Experiment with different paint brands, as some pigments are naturally more transparent than others. Phthalo blue, for instance, is inherently transparent, making it excellent for glazing, whereas cadmium red is often opaque. By understanding these inherent qualities, you gain greater control over your artistic outcomes. Furthermore, adding a tiny amount of white or an opaque color to your glaze can reduce its transparency slightly, offering another layer of control. This fine-tuning is an advanced aspect of mastering glazing techniques.
Applying Glazes for Specific Effects
Glazes can be used to achieve a wide array of specific effects in your decorative artwork. For instance, to create a soft glow, apply a light, warm glaze over an area that catches the light. To deepen shadows and enhance contours, use a darker, cooler glaze in recessed areas. You can also use glazes to add texture by dabbing or sponging them on, creating subtle variations in color and light. Furthermore, scumbling a dry brush with a very thin glaze can create atmospheric effects, particularly useful for backgrounds or distant elements. These targeted applications demonstrate the versatility inherent in mastering glazing techniques.
Common Challenges and Solutions in Glazing
Even experienced artists encounter challenges when working with glazes. One common issue is muddying, which occurs when layers are applied before the previous one is fully dry, or when too much opaque paint is used in the glaze mixture. To avoid this, always ensure complete drying between layers. Another challenge is uneven application, which can result in streaks or blotches. Using a soft, wide brush and applying glazes in smooth, consistent strokes can help. Sometimes, glazes can appear dull; this might be due to using too much medium or not enough pigment. Adjusting your paint-to-medium ratio will usually resolve this. Golden Artist Colors provides excellent resources on glazing mediums. Also, practicing on scrap pieces before applying glazes to your main project is always a good strategy for refining your approach. These practical solutions are essential for truly mastering glazing techniques.
Troubleshooting Uneven Glaze Application
Achieving a smooth, even glaze can sometimes be tricky. If you notice streaks or uneven patches, it might be due to an inconsistent amount of medium in your mix or applying too much pressure with your brush. Try using a soft, flat brush designed for smooth application. Additionally, working quickly and confidently helps to prevent brush marks. If a glaze dries unevenly, you can often correct it by applying another very thin, consistent layer over the top once the previous layer is completely dry. Sometimes, a slightly thicker glaze mixture can also help with smoother coverage. This attention to detail is part of mastering glazing techniques.
Preventing Muddy Colors
Muddy colors are a common frustration for artists learning to glaze. The primary culprit is often applying a new glaze layer before the previous one has fully dried. This causes the wet paint to lift and mix with the new layer, resulting in a dull, muted color. To prevent this, patience is key. Allow each layer to dry completely—this can take anywhere from minutes to hours, depending on your medium and climate. Another cause of muddiness is using too much opaque paint in your glaze mixture. Remember, glazes should be transparent. If your colors are looking dull, revisit your paint-to-medium ratio and ensure you are using pigments with good transparency. Understanding these principles helps significantly in mastering glazing techniques without frustration. For more insights on color theory in painting, consider exploring resources like Handprint’s extensive guide to watercolor mixing, which offers valuable context even for acrylic and oil painters.
Incorporating Glazing into Your Decorative Art Projects
Glazing isn’t just for fine art; it’s a powerful tool for decorative artists seeking to add sophistication and depth to their projects. Whether you’re working on folk art, trompe l’oeil, or intricate painted furniture, glazes can transform your work. Use them to age a piece, create a subtle patina, or add realistic shadows to painted elements. For example, a thin sepia glaze over a painted floral motif can give it an antique appearance. Alternatively, a cool blue glaze can make a distant landscape element recede convincingly. The versatility of mastering glazing techniques means they can be adapted to almost any style or surface. For those looking to expand their skills, exploring Achieve Seamless Transitions: Mastering Smooth Paint Blending in Folk Art could provide complementary insights into achieving refined finishes.
Glazing for Folk Art and Antiquing Effects
Folk art often benefits immensely from the subtle depth and aging effects that glazes can provide. To create an antique look, apply a thin, warm brown or sepia glaze over your finished piece. This adds a soft, aged patina without obscuring the details. For instance, a light amber glaze over a painted wooden box can give it the appearance of a cherished heirloom. You can also use glazes to deepen shadows on carved details or to add a weathered look to painted textures. The ability to control the transparency allows you to build up the effect gradually, ensuring a natural and convincing finish. This makes mastering glazing techniques particularly valuable for traditional and decorative artists.
Enhancing Details and Textures with Glazes
Glazes are excellent for enhancing details and textures without resorting to heavy, opaque lines. A thin, dark glaze applied into crevices or along edges can deepen shadows and make details pop. Conversely, a lighter, luminous glaze can highlight raised areas, drawing the eye to specific textures. For example, on a painted fabric texture, a slightly darker glaze in the folds can create a more realistic drape. On a painted stone surface, a varied application of glazes can mimic the natural variations in color and depth found in real stone. This subtle manipulation of light and shadow through glazing is a hallmark of skilled decorative painting and a key element of mastering glazing techniques.
Applying Glazes to Different Surfaces
While often associated with canvas, glazing can be successfully applied to a variety of surfaces common in decorative arts. Wood, metal, ceramics, and even glass can all benefit from the depth and luminosity glazes provide. The key is to ensure the surface is properly primed and sealed for adhesion. For porous surfaces like wood, multiple layers of primer or gesso might be necessary to create a smooth, non-absorbent base. On non-porous surfaces like glass, a specific glass medium or primer might be required to ensure the glaze adheres properly and doesn’t chip. Adapting your technique to the surface is an important part of mastering glazing techniques across different projects. For further inspiration on overcoming artistic hurdles, consider reading Reignite Your Muse: Strategies to Overcome Creative Blocks in Decorative Painting.
Conclusion: Embracing the Art of Glazing
Mastering glazing techniques will unlock new dimensions in your decorative painting, allowing you to create pieces with unparalleled luminosity, depth, and a captivating interplay of colors. Embrace this journey of layering and light to truly transform your artistic vision. With practice and patience, you’ll find that glazes become an indispensable part of your artistic toolkit, enabling you to achieve sophisticated and professional results in all your decorative art endeavors. Remember, the beauty of glazing lies in its subtlety and the gradual build-up of color and light. Keep experimenting with different mediums, colors, and applications, and you’ll continually discover new ways to bring your artwork to life. This continuous exploration is vital for mastering glazing techniques and maintaining a fresh perspective in your creative process.
FAQ
What is the primary benefit of using transparent layers in painting?
The primary benefit of using transparent layers, or glazes, is the ability to create luminous depth and subtle color shifts that are difficult to achieve with opaque paint alone. These layers allow underlying colors to show through, creating rich optical mixtures and a sense of realism.
How do I prevent my glazed artwork from looking muddy?
To prevent muddy colors, ensure each layer of glaze is completely dry before applying the next. Also, use a high proportion of transparent medium to paint, keeping your glaze mixture thin and translucent. Avoid overworking wet layers.
Can I use this layering method with any type of paint?
While often associated with oils and acrylics, the principles of transparent layering can be adapted to various paint types. The key is to use appropriate transparent mediums designed for your specific paint to achieve the desired effect.
What kind of brush is best for applying thin, even coats?
For applying thin, even coats, a soft, wide, flat brush is generally recommended. These brushes allow for smooth, consistent strokes and help to minimize brush marks, ensuring an even application of your glaze.
How can these methods enhance folk art painting?
In folk art, these methods can add depth to details, create convincing antiquing effects, and introduce subtle variations in color that make a piece feel more authentic and aged. They allow for a nuanced finish that elevates traditional designs.