
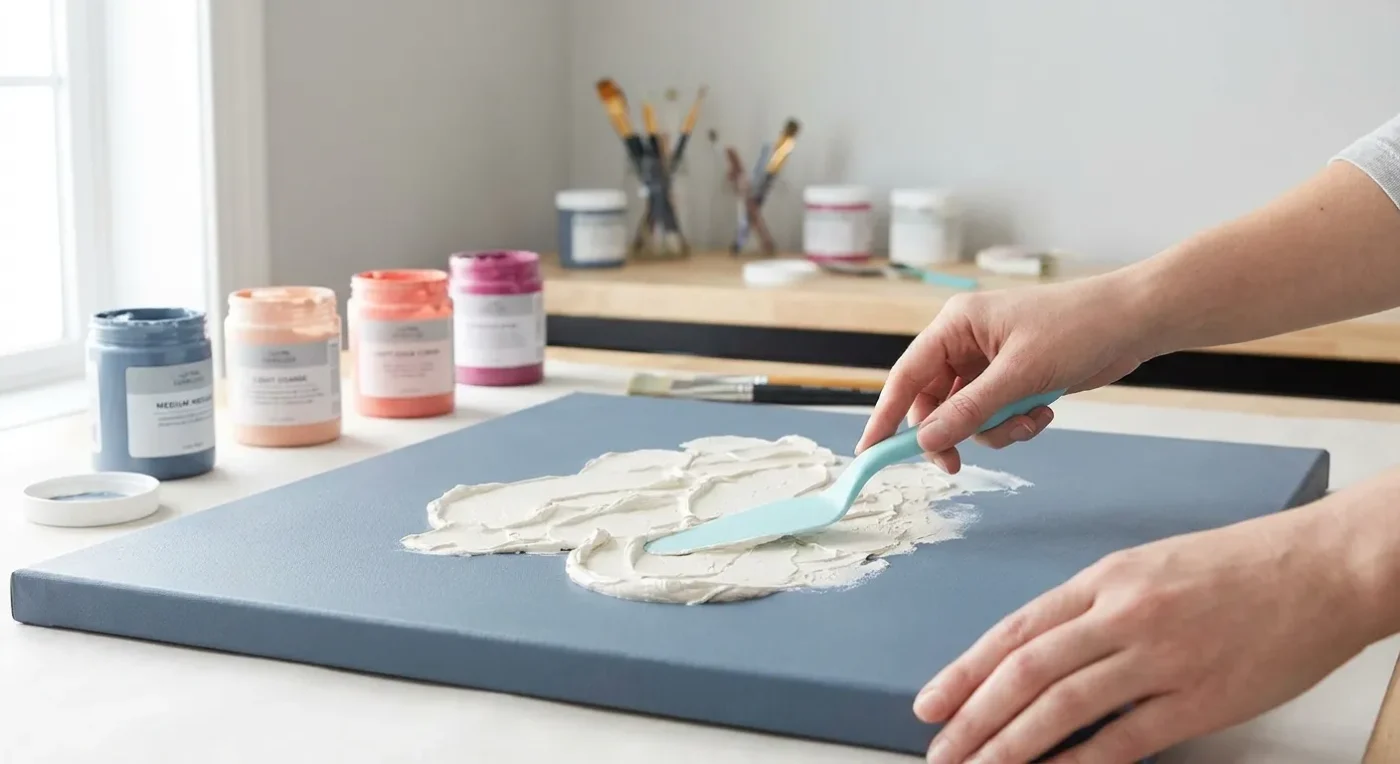

Flat surfaces in decorative painting offer a wonderful canvas for intricate designs. However, introducing tactile elements can transform your work from visually appealing to truly captivating. Adding texture painting brings a new dimension to your projects. It creates visual interest and depth that invites viewers to look closer, and even touch. Whether you are aiming for a rustic, aged look or a modern, abstract feel, texture can elevate your decorative pieces. Let us explore practical techniques to infuse your art with dynamic surfaces.
The Allure of Tactile Art: Why Add Texture?
For centuries, artists have understood the power of texture. It is a fundamental element of design. In decorative painting, incorporating tactile elements goes beyond mere aesthetics. It enhances the narrative of your piece. Furthermore, it engages the viewer on a more profound level. A textured surface catches light differently, creating subtle shadows and highlights that shift with perspective. This movement adds a sense of vitality to your artwork. Moreover, it can evoke specific emotions or memories. Consider the rough bark of a tree or the smooth surface of polished stone. Each texture tells a story. By consciously incorporating these elements, you can enrich your artistic expression and create pieces that truly stand out.
Many artists find that working with various textures also adds an exciting layer to their creative process. The physical act of building up layers and manipulating mediums can be incredibly satisfying. It allows for a more sculptural approach to painting. Ultimately, integrating surface interest into your decorative art makes your work more engaging, memorable, and unique. It is a powerful tool in your artistic repertoire.
Essential Tools and Materials for Building Surface Interest
Before you begin creating textured masterpieces, it is helpful to gather the right tools and materials. The good news is that many common art supplies can be repurposed for this goal. For instance, palette knives are indispensable. They allow for thick application of paint and mediums. Different sizes and shapes offer varied effects. Brushes with stiff bristles, like hog hair brushes, are also excellent for pushing around thick paint and creating expressive marks. You might also consider sponges, crumpled paper, or even found objects like combs or toothbrushes for unique patterns. These can be surprisingly effective.
Regarding mediums, acrylic painting offers immense versatility. Modeling paste, heavy gel medium, and texture gels are popular choices. They can be mixed with paint or applied directly. Sand, fine grit, or even small beads can be incorporated into these mediums for granular effects. Always ensure that any added materials are inert and will not degrade over time. Furthermore, a good quality primer or gesso is essential. It prepares your surface to hold the added weight and dimension. Therefore, selecting the right materials is the first step towards successful textured artwork. For more information on various art terms, you might find our Glossary of Terms helpful.
Practical Ways for Adding Texture Painting
One of the simplest ways to add texture is through the strategic use of mediums. Acrylic painting mediums like modeling paste or heavy gel medium can be applied directly to your surface before or during painting. These create raised areas that you can then paint over, glaze, or dry-brush to highlight the peaks and valleys. Stenciling with a thicker medium, rather than just paint, can also create beautiful raised patterns. For example, applying a thick layer of modeling paste through a stencil results in a raised, sculptural design. This technique is particularly effective for creating ornate borders or focal points.
Another effective technique is impasto, where paint is applied thickly with a brush or palette knife, leaving visible brushstrokes or peaks. This works wonderfully for creating a sense of movement or emphasizing certain elements within your design. Think of Van Gogh’s swirling skies. While decorative painting often involves more controlled strokes, impasto can introduce a similar vibrancy. Consider embedding small, lightweight objects like sand, fine sawdust, or even dried tea leaves into your paint or medium for a truly unique tactile experience. Just ensure they are sealed properly to prevent shedding or deterioration. Experimentation is key when exploring these methods. Furthermore, remember that even subtle variations in surface can make a big difference.
Creative Texture Building Techniques
Beyond traditional mediums, many everyday items can be repurposed for creating interesting surface qualities. For instance, plastic wrap pressed into wet paint or medium and then carefully lifted can create intriguing organic patterns. Similarly, crumpled aluminum foil can impart a metallic, crinkled effect. Fabric scraps, lace, or even dried leaves can be adhered to your surface with strong adhesive or gel medium, then painted over. This technique is known as collage. It introduces a completely different kind of tactile element. When using collage elements, consider their weight and how they will integrate with your overall composition. You want them to enhance, not detract from, the main image.
Sgraffito is another engaging technique. It involves applying layers of paint or medium and then scratching through the top layer to reveal the color or texture underneath. This method is particularly effective for creating fine lines, intricate details, or distressed effects. Various tools can be used for sgraffito, from the blunt end of a paintbrush to specialized carving tools. Moreover, consider using household items like sponges, bubble wrap, or even old toothbrushes to dab or drag across wet paint. Each tool will leave a distinct mark, adding unique character to your piece. These creative approaches expand the possibilities for adding texture painting to your projects.
Layering and Blending for Enhanced Depth
Once your initial texture is established, the real magic happens in how you layer and blend your colors. This process can significantly enhance the perceived depth and realism of your textured surfaces. For example, after applying a base texture, allow it to dry completely. Then, apply a thin wash of a darker color. This wash will naturally settle into the crevices, creating shadows and accentuating the raised areas. Subsequently, wipe away excess paint from the peaks, or dry brush a lighter color over them. This technique is especially effective for achieving an aged or weathered look. The interplay of light and shadow is crucial for making textures appear three-dimensional.
Consider also the use of glazes. Glazes are transparent layers of color that allow the underlying texture and colors to show through. Applying multiple thin glazes can build up rich, luminous depth without obscuring the tactile qualities. Furthermore, strategic color blending on textured surfaces can create optical illusions. For instance, blending lighter colors on raised areas and darker colors in recessed areas will amplify the sense of dimension. Mastering these layering and blending techniques is essential for truly successful decorative texture. It allows you to control how light interacts with your artwork. Furthermore, it ensures your surface interest is fully integrated into the overall design.
Enhancing Visual and Tactile Depth
Once your texture is established, how you paint over it is crucial for maximizing its effect. Dry brushing, where very little paint is applied to a dry brush and lightly dragged over a textured surface, will catch only the raised areas. This technique emphasizes the texture beautifully. It is excellent for highlighting peaks and creating a weathered appearance. Washing a thin, transparent layer of paint over a textured area allows the color to settle into the crevices. This creates shadows and enhances depth. For instance, a dark wash over a light texture will make the texture pop. Similarly, a light wash over a dark texture can soften its edges.
Experiment with contrasting textures within a single piece. Perhaps a smooth, central motif surrounded by a heavily textured background. The interplay between different surfaces can create a sophisticated visual narrative. This contrast draws the eye and provides visual interest. Remember, the goal is not just to add bumps, but to use texture purposefully to enhance your composition and tell your artistic story. With a little practice, you will find that adding texture painting becomes an intuitive and exciting part of your decorative art process. It allows for greater creative freedom. For more inspiration on overcoming creative challenges, you might read our article on Reignite Your Muse: Strategies to Overcome Creative Blocks in Decorative Painting.
Integrating Texture into Different Decorative Styles
The beauty of incorporating surface interest is its adaptability across various decorative painting styles. For folk art, texture can emulate the worn, rustic feel of antique pieces. Think of crackle mediums or subtle gesso build-up to mimic aged wood or pottery. In contemporary decorative art, bold, sculptural textures can become the focal point, creating abstract landscapes or dynamic patterns. For example, using a palette knife to create thick, expressive marks can give a modern edge to a traditional floral design. Even in more delicate styles, a touch of subtle texture can add an unexpected element of surprise and depth.
When working with texture, consider the scale and proportion of your piece. Large, sweeping textures might suit a bigger canvas, while finer, more intricate textures are better for smaller, detailed works. The type of surface also plays a role. Wood, canvas, or even metal can all accommodate texture, but each will react differently to various mediums. For instance, a very smooth surface might require more preparation to ensure adherence. Ultimately, the key is to allow the texture to complement your chosen style, rather than overpower it. This careful integration ensures a harmonious and compelling final piece. Furthermore, this versatility makes adding texture painting a valuable skill for any decorative artist. For further reading on surface preparation, consider resources from reputable art suppliers like Golden Artist Colors.
Common Mistakes to Avoid When Adding Texture
While adding texture painting offers immense creative freedom, a few common pitfalls can hinder your results. Firstly, applying texture too thickly or unevenly can lead to cracking or flaking over time. Always follow the manufacturer’s instructions for mediums and allow adequate drying time between layers. Patience is crucial here. Secondly, overcrowding a piece with too many different textures can make it look chaotic rather than cohesive. Choose one or two primary textural elements and allow them to shine. Less is often more when it comes to visual complexity.
Another mistake is neglecting to seal or protect your textured artwork. Exposed textures can be vulnerable to dust, damage, and environmental factors. A good quality varnish or sealant is essential for preserving your work. Furthermore, be mindful of the weight of your textured piece, especially if you are adding heavy elements. Ensure your support surface can handle the added burden. Finally, do not be afraid to experiment, but also learn from your trials. Not every texture will work for every project, and that is perfectly fine. Each experiment teaches you something new about your materials and your artistic preferences. Avoiding these common errors will help you achieve more professional and lasting textured artworks. For information on art material safety, an excellent resource is the AIC Wiki, maintained by the American Institute for Conservation.
The Joy of Experimentation: Finding Your Textured Voice
Ultimately, the journey of adding texture painting is one of discovery and experimentation. There are no strict rules, only guidelines to help you explore the vast possibilities. Do not be afraid to mix and match techniques. Combine impasto with embedded objects, or use stenciling in conjunction with dry brushing. The most unique and compelling textures often arise from unexpected combinations. Furthermore, observe the world around you. Notice the textures in nature, in architecture, and in everyday objects. These observations can inspire new ways to incorporate tactile elements into your art.
Keep a sketchbook or a dedicated texture journal. Document your experiments, noting which mediums you used, how you applied them, and the results you achieved. This practice will help you build a personal library of textural effects. It will also help you refine your techniques. Embrace imperfections, as they often add character and authenticity to your work. Each piece you create with added texture will contribute to your growing skill set and artistic confidence. By skillfully adding texture painting to your decorative projects, you can create pieces that are not only beautiful to behold but also engaging to experience. Embrace these techniques to bring dynamic surfaces and captivating depth to your artistic creations.
FAQ
What is the easiest way to start creating textured art?
The easiest way to begin is by using acrylic modeling paste or heavy gel medium. Apply it with a palette knife to create raised areas. You can also try thick paint application, known as impasto, directly with a brush.
Can I add texture to any type of paint?
While texture can be added to various paints, acrylics are generally the most versatile due to their quick drying time and ability to mix with a wide range of mediums. Oil paints can also be used for impasto, but they have much longer drying times.
How do I prevent textured paint from cracking?
To prevent cracking, always apply mediums in layers, allowing each layer to dry thoroughly. Avoid applying extremely thick layers all at once. Also, ensure your substrate is rigid enough to support the added weight and dimension.
What household items can I use for surface interest?
Many household items work well! Consider using sponges, crumpled plastic wrap, aluminum foil, old toothbrushes, or even sand and coffee grounds (mixed into a medium) to create unique surface effects in your artwork.
How do I highlight the raised areas of my textured piece?
Dry brushing is an excellent technique for highlighting raised areas. Apply a very small amount of paint to a dry brush and lightly drag it across the textured surface. This catches only the peaks, making the texture stand out.