
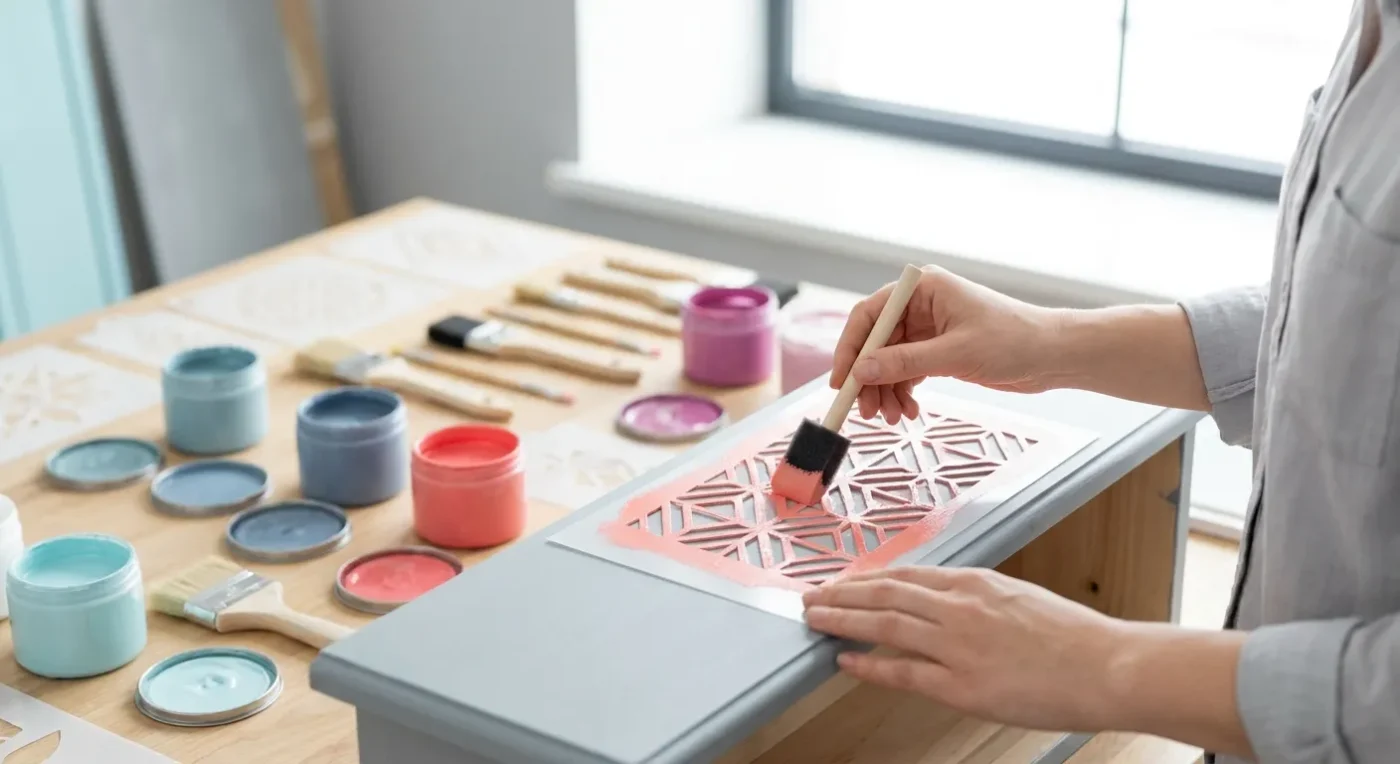

Adding intricate details to your decorative painting doesn’t always require advanced freehand skills. Stenciling decorative painting is an accessible and effective technique for beginners and experienced artists alike to introduce precise patterns, lettering, and motifs. Stencils offer a fantastic way to achieve clean, repeatable designs, allowing you to create professional-looking results with ease. This guide will walk you through the basics of stenciling, helping you elevate your folk art projects.
Many aspiring folk artists are eager to incorporate elaborate designs but feel intimidated by complex brushwork. Fortunately, stenciling provides a wonderful solution. It allows you to replicate intricate patterns consistently, which is especially useful when decorating multiple items or creating symmetrical designs. Furthermore, this method builds confidence, as you see professional-looking results quickly. This article will explore the essentials of working with stencils, from choosing the right tools to mastering application techniques, ensuring your decorative art pieces truly shine.
Mastering Stenciling Decorative Painting
To begin, gather your supplies for successful stenciling decorative painting. You will need a clean surface, such as wood, canvas, or even fabric. Your chosen stencil, acrylic paints, and a stencil brush or a dense foam pouncer are also essential. Additionally, painter’s tape or a temporary adhesive spray will be crucial for securing your stencil. First, position your stencil securely on your surface. Use painter’s tape around the edges or a light mist of temporary adhesive spray on the back to prevent any movement. Ensure it’s perfectly flat against the surface; this step is vital for crisp lines.
Next, load your stencil brush with a small amount of paint. It’s crucial to offload any excess paint onto a paper towel. Too much paint will inevitably bleed under the stencil, resulting in blurry lines and a less professional finish. Using an up-and-down dabbing motion, apply the paint through the stencil openings. For a crisp finish, apply several thin coats rather than one thick one. This layered approach allows for greater control over opacity and reduces the risk of paint seepage. Once you’ve achieved your desired opacity, carefully remove the stencil while the paint is still slightly damp. Immediately clean your stencil with soap and water to ensure it’s ready for future use. With practice, you will master this technique and add beautiful, consistent details to all your projects.
Choosing the Right Stencils and Paints
Selecting the appropriate stencil and paint types is fundamental for achieving the best results in decorative painting. Stencils come in various materials, including Mylar, vinyl, and even metal. Mylar stencils are durable and reusable, making them a popular choice for folk art enthusiasts. Vinyl stencils are often adhesive-backed and single-use, perfect for intricate designs on smooth surfaces. For example, when painting on fabric, a self-adhesive stencil can prevent shifting. Consider the size and complexity of the design you wish to create. Larger, simpler stencils are excellent for beginners, whereas more intricate patterns require a steadier hand and perhaps a temporary adhesive.
Regarding paints, acrylic paints are generally recommended for stenciling due to their quick drying time and versatility. You can use craft acrylics, which are readily available and come in a vast array of colors. For specific projects, however, you might consider specialty paints. For instance, fabric paints are ideal when you are painting on fabric, as they remain flexible and washable. Similarly, outdoor acrylics are suitable for items exposed to the elements. Always ensure your paint is not too thin, as watery paint is more prone to bleeding under the stencil. Conversely, excessively thick paint can clog the stencil openings. Therefore, a medium consistency is usually best for clean application.
When selecting brushes, a dedicated stencil brush with stiff, flat bristles is highly effective. Foam pouncers are another excellent option, especially for achieving an even, slightly textured finish. These tools help you apply paint with a controlled dabbing motion, which is key to preventing paint from seeping under the stencil’s edges. You might also find small detail brushes useful for touching up any minor imperfections after the stencil is removed. Proper tool selection significantly contributes to the success of your decorative art projects.
Preparing Your Surface for Stenciling
Surface preparation is a critical step that often gets overlooked, yet it greatly impacts the final outcome of your decorative painting. Regardless of whether you are working on wood, canvas, glass, or fabric, a clean, smooth surface is essential. For wooden surfaces, ensure they are sanded smooth and free of dust. A coat of primer or a base coat of paint is often beneficial, providing a consistent surface for your stencil design. This base coat should be completely dry before you apply the stencil.
When stenciling on fabric, pre-wash the fabric to remove any sizing or fabric softeners that might interfere with paint adhesion. Ironing the fabric smooth also helps create an even surface for the stencil. For glass or ceramic, clean the surface thoroughly with rubbing alcohol to remove any oils or residues. This ensures the paint adheres properly and prevents the stencil from lifting prematurely. A well-prepared surface allows for better paint adhesion and sharper stencil lines, ultimately leading to a more professional-looking finished piece. This careful preparation is a hallmark of successful folk art creation.
Advanced Tips for Perfect Stenciling
Once you are comfortable with the basic techniques, you can explore advanced tips to elevate your stenciling decorative painting. Experiment with color blending within a single stencil design. For example, apply one color to the bottom of a design and gradually blend in another color towards the top using a separate brush or pouncer. This creates beautiful gradients and adds depth to your patterns. Another technique involves using multiple stencils to build complex scenes. Layering different patterns, such as a floral stencil over a geometric background, can produce intricate and visually appealing effects. You can find inspiration by studying drawing inspiration from historical folk art patterns.
Consider using repositionable spray adhesive for very intricate stencils or uneven surfaces. This ensures the stencil stays perfectly in place, minimizing bleed. However, always test the adhesive on an inconspicuous area first to ensure it doesn’t damage your surface or leave a residue. Furthermore, don’t be afraid to combine stenciling with freehand painting. You can stencil a base pattern and then add hand-painted details or embellishments to create unique, personalized touches. This combination allows for a blend of precision and artistic freedom, characteristic of many folk art styles. For instance, after stenciling a border, you might freehand paint small berries or leaves to complement the design. This hybrid approach truly enhances the artistic expression.
Another excellent tip is to practice on scrap material before applying the stencil to your final project. This helps you get a feel for the paint consistency, brush pressure, and overall technique. Practicing also allows you to troubleshoot any potential issues, such as paint bleeding or uneven application, without affecting your main artwork. Remember that patience is key; rushing the process often leads to mistakes. By taking your time and applying these advanced strategies, your decorative painting will reach new levels of sophistication and beauty. For more general advice on avoiding errors, check out common decorative painting blunders and how to fix them.
Creative Applications of Stenciling in Folk Art
Stenciling is not limited to flat surfaces or simple patterns; its versatility makes it perfect for a wide range of folk art projects. Imagine transforming ordinary household items into charming decorative pieces. You can stencil intricate borders on wooden trays, personalize fabric tote bags with unique motifs, or add elegant designs to ceramic plates (for decorative use only, not food safe). The possibilities are truly endless. For example, consider adding folk art flourishes to eco-friendly home decor items, bringing both beauty and sustainability to your craft.
Beyond traditional surfaces, stenciling can be used to create stunning wall art, enhance furniture, or even decorate small accessories like jewelry boxes. Think about combining different stencil designs to create a cohesive theme across multiple items. Perhaps a series of nested patterns on a set of coasters, or a repeated floral motif on a wooden chest. This technique allows for consistency while still offering creative freedom. You might even use stencils to create backgrounds or textures before adding freehand elements, giving your artwork greater depth. The use of stencils is a fantastic way to explore new design possibilities and add a professional touch to all your decorative painting endeavors.
For those interested in specific folk art styles, stenciling can be adapted to mimic traditional patterns. For example, you might find stencils inspired by Pennsylvania Dutch hex signs or Swedish Dala horse motifs. These stencils provide an excellent starting point for learning about and incorporating historical designs into your contemporary projects. By understanding the historical context, you can create pieces that are both beautiful and culturally rich. Additionally, stenciling can be a stepping stone to developing your freehand skills, as it helps you understand design composition and color placement. This method is incredibly empowering for artists at any stage.
Maintaining Your Stencils and Tools
Proper maintenance of your stencils and tools is vital for their longevity and for ensuring consistent, high-quality results in your stenciling decorative painting. After each use, immediately clean your stencils. If paint dries on them, it can be much harder to remove and may damage the stencil material. Warm water and mild soap are usually sufficient for acrylic paints. For stubborn paint, a soft brush can help gently scrub away residue. Lay stencils flat or hang them to dry completely to prevent warping. Storing them flat also helps maintain their shape and prevents creases.
Your stencil brushes and pouncers also require immediate cleaning. Rinse them thoroughly with water and soap until all paint is removed. Reshape the bristles of your brushes and allow them to air dry completely before storing. This prevents the bristles from becoming stiff or misshapen. Neglecting to clean your tools can lead to hardened paint on the bristles, making them ineffective for future projects. Regular cleaning ensures your tools remain in optimal condition, ready for your next creative session. This dedication to tool care reflects a professional approach to your craft, ultimately enhancing your artistic journey.
Organize your stencils by theme, size, or material for easy access. A simple binder with clear sleeves or a designated drawer can keep your collection tidy and protected. This organization saves time and prevents damage to your valuable stenciling resources. Remember, well-maintained tools and stencils are an investment in your artistic practice. They allow you to continue creating beautiful decorative art with ease and precision for years to come. For more on materials, consider exploring The Spruce Crafts’ stenciling tips.
Troubleshooting Common Stenciling Issues
Even with careful preparation, you might encounter some common issues when stenciling. One frequent problem is paint bleeding under the stencil. This usually occurs because too much paint was on the brush or the stencil was not securely adhered to the surface. To fix this, always offload excess paint and ensure the stencil is firmly in place. Using a temporary spray adhesive can be particularly helpful for preventing bleed. Another issue is uneven paint application, where some areas appear darker or lighter than others. This often happens if you don’t apply enough thin coats or if you vary your dabbing pressure. Consistent, light dabbing motions across the entire stencil opening will help achieve an even finish.
Sometimes, the stencil might shift while you are working, leading to misaligned patterns. This highlights the importance of securing the stencil properly from the outset. If you are working on a large project, consider marking the stencil’s position with light pencil marks before you begin painting. This way, if you need to reposition it, you can accurately align it again. Faded or blurry edges can also be a problem. This often indicates that the paint was too thin or the stencil was removed before the paint had a chance to set slightly. Allow paint to become tacky before carefully lifting the stencil. For persistent issues, reviewing your technique and ensuring your tools are clean and in good condition can often resolve the problem. For additional resources on techniques, visit StencilGirl Products’ guide.
Conclusion
Stenciling decorative painting is a rewarding technique that empowers artists of all skill levels to add intricate and professional-looking details to their folk art projects. From selecting the right tools and paints to mastering application and maintenance, each step contributes to the beauty and longevity of your creations. By embracing the versatility of stencils, you can transform ordinary objects into extraordinary works of art, express your unique style, and confidently explore new design possibilities. Remember, practice and patience are your best allies in achieving crisp lines and stunning patterns. Continue to experiment with colors, layers, and combinations, allowing your creativity to flourish. Your journey into the world of stenciling will undoubtedly enrich your decorative painting experience, bringing precision and artistry to every piece you create. We encourage you to try stenciling for your next project, whether it’s a small coaster or a larger piece of furniture. The satisfaction of seeing your designs come to life with such crispness is truly gratifying.
FAQ
What type of paint is best for stenciling folk art?
Acrylic paints are generally the best choice for stenciling folk art due to their quick drying time, vibrant colors, and versatility on various surfaces like wood, canvas, and fabric. Make sure the paint consistency is not too thin to prevent bleeding.
How do I prevent paint from bleeding under my stencil?
To prevent paint from bleeding, always offload excess paint from your brush onto a paper towel. Secure your stencil firmly to the surface using painter’s tape or a temporary spray adhesive. Apply paint in light, dabbing motions, building up several thin coats rather than one thick one.
Can I use stencils on curved surfaces?
Yes, you can use stencils on curved surfaces. Flexible stencils, like those made from Mylar, work best. Temporary spray adhesive is particularly useful in these situations to ensure the stencil conforms to the curve and stays in place, preventing movement and paint seepage.
How do I clean my stencils after painting?
Clean your stencils immediately after use. For acrylic paints, warm water and mild soap are usually sufficient. Gently rub any remaining paint with a soft brush, then lay the stencil flat or hang it to dry completely to prevent warping. This ensures they are ready for your next project.
What if my stenciled design looks uneven?
Uneven stenciled designs often result from inconsistent paint application or pressure. To achieve an even look, apply several thin coats of paint with a consistent, light dabbing motion across the entire stencil opening. Practice on a scrap surface to refine your technique and ensure uniform coverage.
Are there any tips for layering stencils?
Yes, for layering stencils, ensure each layer of paint is completely dry before applying the next stencil. Use registration marks if provided on the stencil, or create your own light pencil marks to ensure accurate alignment. Experiment with different colors and opacities for stunning layered effects.