
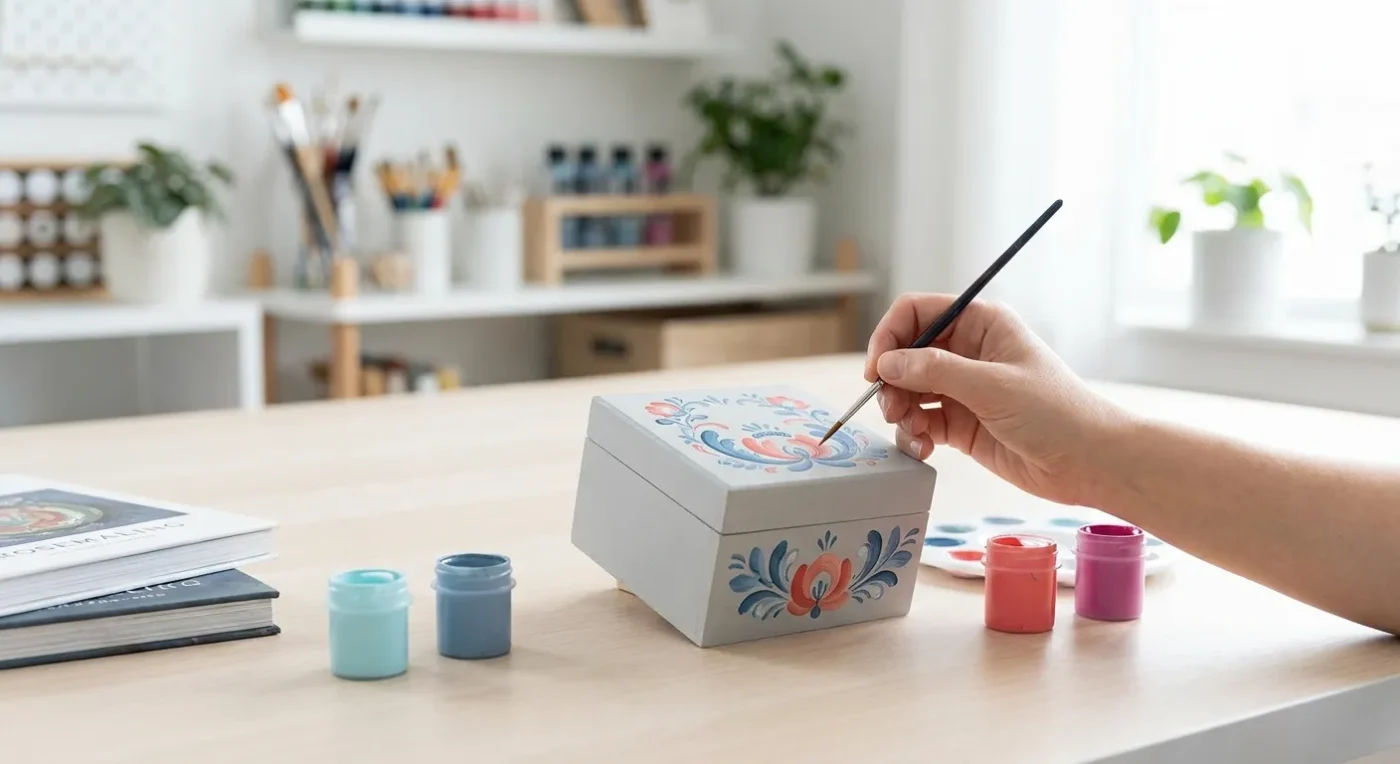

The intricate beauty of Rosemaling, a traditional Norwegian folk art, offers a captivating way to adorn everyday objects with stunning detail. If you’re a hobbyist decorative painter looking to expand your skill set, mastering rosemaling painting techniques can unlock a new level of artistry. This guide focuses on breaking down the core elements of Rosemaling, making it accessible for small home decor projects like wooden boxes, trays, or even picture frames.
At Paint Works Mag, we’re dedicated to providing highly specific and accessible how-to content, empowering you to tackle even seemingly complex styles with confidence. The desire for unique, handmade items continues to grow among DIY enthusiasts, making traditional art forms like Rosemaling more relevant than ever. Let’s delve into the elegant world of Norwegian decorative painting and bring its charm into your home.
Understanding the Fundamentals of Rosemaling
Rosemaling (literally “rose painting”) is characterized by flowing lines, stylized flowers, scrollwork, and geometric patterns. Often painted with oil paints, it is beautifully adapted to acrylics for the hobbyist. Key to its distinctive look are specific brushstrokes and a sense of movement. While traditional Rosemaling can be quite elaborate, we’ll focus on foundational strokes perfect for smaller surfaces. Consequently, these skills are transferable to larger projects as well.
Essential Materials for Your Rosemaling Journey:
- Small Wooden Project: A plain box, coaster, or small plaque is ideal.
- Acrylic Paints: Choose a palette of traditional Rosemaling colors—deep reds, blues, greens, and creamy whites or yellows for highlights. Consider water-based solutions for easier cleanup and eco-friendliness, aligning with current industry emphasis on sustainable practices.
- Brushes: A small round brush (e.g., #2 or #4), a liner brush (e.g., #0 or #00), and a small flat brush (e.g., 1/4 inch) are essential.
- Palette, Water Container, Paper Towels: Standard painting supplies are needed.
- Optional: Tracing paper and a light pencil for initial design placement.
Core Rosemaling Painting Techniques and How to Practice Them
Learning the foundational strokes is crucial for developing your Rosemaling style. Practice is key to achieving smooth, confident lines and shapes. Therefore, dedicate time to these exercises.
1. The Comma Stroke: Building Blocks of Rosemaling
This is perhaps the most fundamental stroke in Rosemaling. It’s a teardrop shape that forms petals, leaves, and scroll components. Indeed, many intricate designs are built from variations of this simple stroke.
- How-To: Load your round brush with paint. Start with firm pressure on the tip, then gradually lighten the pressure as you pull the brush, lifting it to create a fine tail. Practice varying the size and curve of your comma strokes on scrap paper.
- Application: Use these to form the basic shapes of flowers or clusters of leaves. For example, several comma strokes arranged in a circle can create a simple rosebud.
2. The C-Stroke and S-Stroke: Adding Flow and Movement
These strokes are crucial for creating the characteristic flowing scrollwork and elegant curves of Rosemaling. They provide the organic movement that defines the style.
- How-To (C-Stroke): Load your liner brush. Press lightly, curve the brush in a ‘C’ shape, maintaining even pressure, then lift. The goal is a smooth, consistent line.
- How-To (S-Stroke): Similar to the C-stroke, but reverse the curve mid-stroke to form an ‘S’. This requires a controlled hand and fluid motion.
- Application: These strokes connect elements, form graceful tendrils, and add dynamism to your designs. Consequently, they are vital for creating complex borders and filler patterns.
3. The Dot and Teardrop Fill: Adding Detail and Texture
Small dots and teardrops add significant detail and often serve as accents or fillers within larger motifs. They bring a delicate touch to your work.
- How-To (Dot): Use the very tip of your round or liner brush, or even the blunt end of a pencil, to dab small, uniform dots.
- How-To (Teardrop Fill): Similar to the comma stroke, but often smaller and used in clusters to fill spaces or add texture to petals.
- Application: Dots can highlight scrollwork or the centers of flowers. Teardrops can create subtle shading or intricate patterns within larger shapes.
4. Blending and Shading: Creating Depth
While traditional Rosemaling can be quite flat, subtle blending and shading add depth and dimension to your work. This is particularly effective with acrylics.
- How-To: Load your flat brush with a base color. Pick up a tiny amount of a darker or lighter color on one corner of the brush. Blend slightly on your palette, then apply to your project. This creates a soft gradient.
- Application: Use shading along the edges of petals or scrolls to make them appear more rounded. This technique enhances the overall visual appeal of your Rosemaling designs. For more advanced blending, you might explore mastering glazing techniques.
Designing Your Small Rosemaling Projects
Once you’ve practiced the basic strokes, it’s time to apply them to your projects. Start simple and build confidence. Furthermore, remember that practice is the foundation of mastering these decorative painting techniques.
Choosing Your Design Elements
Rosemaling patterns often feature a central motif, surrounded by scrollwork and smaller floral elements. For small projects, simplify. Perhaps focus on a single large flower with a few scrolls, or a border design. For instance, consider researching historical examples for inspiration. The Vesterheim Norwegian-American Museum offers a wealth of information on Rosemaling history and styles.
Transferring Your Design
For beginners, sketching or tracing your design onto the project surface is highly recommended. This provides a roadmap for your brushwork.
- Method: Sketch directly with a light pencil, or trace a printed design using graphite paper. The lines should be faint, as they will be covered by paint.
- Tip: Keep your design proportional to your small project. Overly complex designs can be frustrating on a limited surface.
Advanced Tips for Your Rosemaling Painting Techniques
As you gain confidence, you can explore more nuanced aspects of Rosemaling. These tips will help refine your skills and make your work truly stand out.
Controlling Paint Consistency
Acrylic paints can be thick. Thinning them slightly with water or a flow improver will allow for smoother, more consistent strokes, especially with liner brushes. However, do not over-thin, as this can reduce opacity.
Brush Care and Maintenance
Proper brush care is essential for maintaining the integrity of your tools and ensuring consistent results. Always clean your brushes thoroughly after each painting session. Subsequently, reshape the bristles before storing them.
Embracing Imperfection
Rosemaling is a folk art, and slight variations add to its charm. Do not strive for machine-like perfection. Instead, embrace the handmade quality of your work. Each stroke contributes to the unique character of your piece.
Bringing Your Rosemaling Projects to Life
The joy of decorative painting lies in seeing your creations come to life. These rosemaling painting techniques are not just about replicating patterns; they are about expressing a rich cultural heritage through your own hand.
Finishing Your Project
Once your paint is dry, consider applying a clear varnish to protect your beautiful Rosemaling work. This will safeguard it from wear and tear, ensuring its longevity. A satin or matte finish often complements the traditional aesthetic.
Sharing Your Art
Showcase your completed projects! Share them with friends and family, or even online. The decorative arts community is vibrant and supportive. Furthermore, sharing your work can inspire others to explore decorative painting as well.
The Enduring Appeal of Traditional Painting Styles
Traditional art forms like Rosemaling offer a connection to history and a sense of accomplishment that modern crafts sometimes lack. Learning these specific rosemaling painting techniques allows you to participate in a centuries-old tradition, bringing beauty and heritage into contemporary spaces. Moreover, it’s a rewarding journey that builds skill and artistic confidence. For those interested in transforming everyday items, our guide on upcycling everyday objects with decorative paint offers further inspiration.
We encourage you to experiment with colors and compositions. While traditional Rosemaling colors are classic, adapting them to your personal taste can create unique and appealing pieces. However, always respect the core elements of the style. The decorative arts are a vast field, and mastering rosemaling painting techniques is a fantastic addition to any artist’s repertoire. Continue your artistic exploration and discover new ways to express your creativity. For additional resources and inspiration, consider visiting the official site of Norway for cultural insights.
Conclusion
Mastering rosemaling painting techniques is a rewarding endeavor for any decorative painter. By focusing on foundational strokes, understanding design principles, and practicing consistently, you can create stunning small projects that reflect the beauty of Norwegian folk art. Remember that every stroke is a step in your artistic journey. Keep painting, keep learning, and most importantly, enjoy the process of bringing these timeless designs to life. Paint Works Mag is here to support you every step of the way, offering guides and inspiration for your artistic pursuits. Feel free to contact us if you have any questions.
FAQ
What kind of paint is best for Norwegian folk art painting?
While traditional Norwegian folk art painting often uses oil paints, acrylics are an excellent choice for hobbyists. Acrylics offer easier cleanup, faster drying times, and a wide range of vibrant colors, making them very accessible for beginners and small projects.
How can I make my Rosemaling designs look authentic?
To achieve an authentic look, focus on smooth, flowing lines and classic Rosemaling motifs such as stylized flowers, scrollwork, and comma strokes. Study historical examples and practice the foundational strokes diligently. Using a traditional color palette also helps maintain authenticity.
Are there specific brushes needed for this decorative painting style?
Yes, specific brushes are very helpful. A small round brush is essential for comma strokes and petals. A fine liner brush is crucial for delicate scrollwork and fine details. A small flat brush can be used for broader strokes and subtle blending. These tools help execute the distinctive brushwork.
Where can I find design inspiration for my Rosemaling projects?
Inspiration can be found in books on Norwegian folk art, online galleries of traditional Rosemaling, and cultural museum websites. Additionally, attending workshops or joining online communities dedicated to decorative painting can provide a wealth of ideas and guidance.
Can beginners learn traditional Norwegian painting?
Absolutely! Traditional Norwegian painting, like any art form, is accessible to beginners. Starting with simple projects, focusing on basic strokes, and gradually increasing complexity will build confidence and skill. Consistent practice is the most important factor for success.