
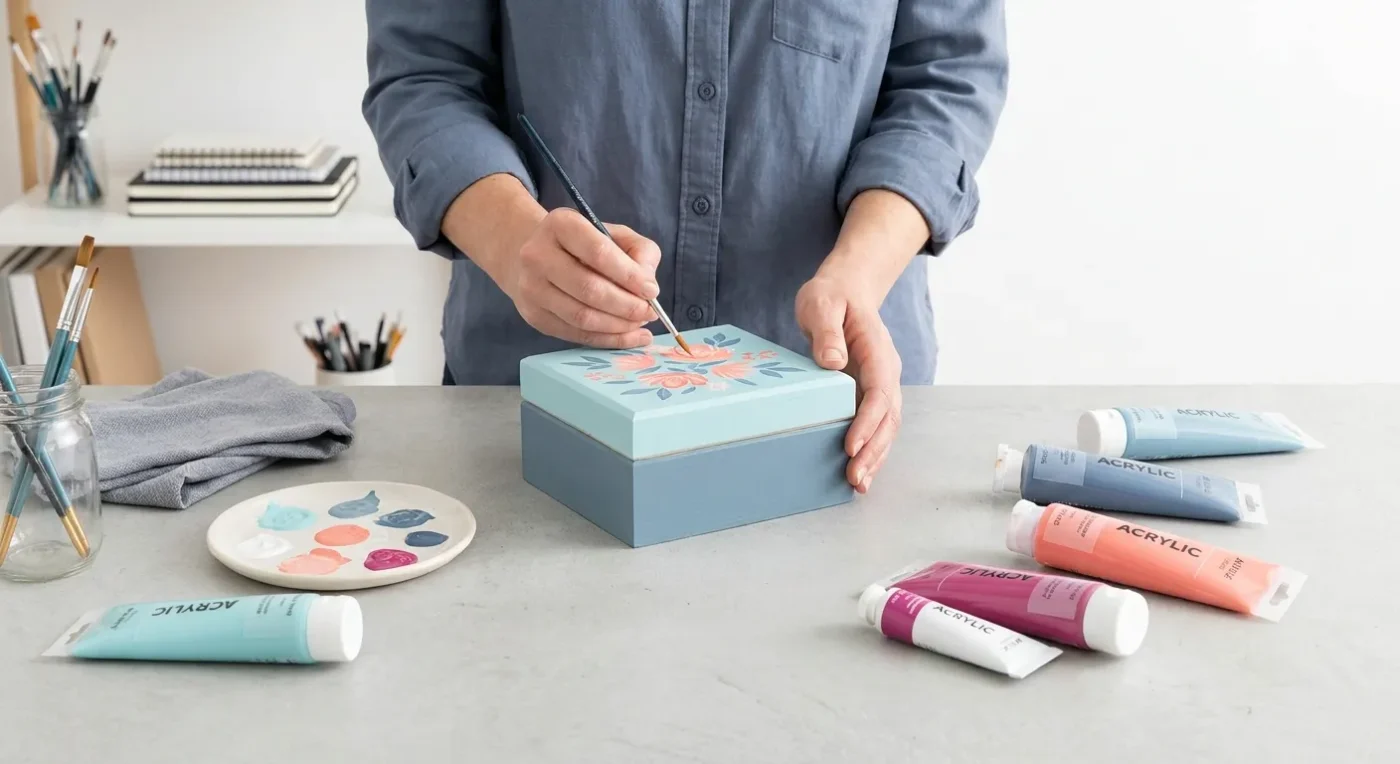

Transforming an ordinary wooden box into a personalized treasure is a rewarding decorative painting project. Learning to paint keepsake box not only creates a beautiful storage solution but also allows you to express your artistic style. This step-by-step guide will help you bring a plain wooden box to life with charming folk art designs, making it a perfect gift or a cherished item for your own home. Moreover, this project is ideal for both beginners and experienced artists alike, offering a chance to refine your skills.
Step 1: Prepare Your Wooden Box for Painting
Start with a clean, unfinished wooden box. Gently sand the entire surface with fine-grit sandpaper (around 220-grit) to ensure it’s smooth and free of splinters. This crucial step helps the paint adhere better. Wipe away all sanding dust with a tack cloth or a damp paper towel and let it dry completely. If desired, apply a wood primer to seal the wood and provide an even base for your paint. Allow the primer to dry according to manufacturer instructions. Preparing your surface properly is fundamental for a lasting finish.
Step 2: Basecoat and Design Your Keepsake Box
Once your box is prepped, apply one or two coats of your chosen base color using acrylic paint. Let each coat dry thoroughly. For folk art, earthy tones like cream, soft blue, or muted green make excellent backgrounds. Once the basecoat is dry, it’s time for your design! You can sketch your folk art motifs directly onto the box with a pencil, use stencils, or freehand your design. Common folk art elements include simple flowers, leaves, hearts, birds, or geometric patterns. When you paint keepsake box, don’t be afraid to experiment with color combinations that reflect your personal style. Consider exploring drawing inspiration from historical folk art patterns to spark your creativity. Furthermore, selecting the right brushes is essential for achieving crisp lines and smooth fills. For instance, a detailed brush kit can significantly improve your results.
Step 3: Adding Intricate Details and Embellishments
After applying your main design, it’s time to add those intricate details that make folk art truly special. Use smaller brushes for fine lines, dots, and highlights. Think about adding decorative borders or small flourishes around your main motifs. For example, tiny white dots can add a charming, antique feel to your painted box. You might also consider layering colors to create depth and dimension. This technique is particularly effective in folk art, giving your designs a more polished look. Additionally, don’t rush this stage; patience will yield the best results. Many artists find joy in this detailed work, seeing their vision come to life stroke by stroke.
Step 4: The Art of Shading and Highlighting
To give your folk art designs more character, incorporate shading and highlighting. Shading under leaves or petals can create a sense of depth, while highlights on the upper edges can make elements pop. Consequently, your designs will appear more three-dimensional. Use a slightly darker shade of your base color for shading and a lighter tint for highlighting. Blend these colors smoothly for a natural transition. Learning advanced folk art color blending techniques can greatly enhance the visual impact of your painted keepsake box. Practicing these techniques on a scrap piece of wood beforehand can be very beneficial. Remember, even subtle shading can make a big difference in the overall appearance of your project.
Step 5: Applying a Protective Finish to Your Painted Keepsake Box
Finish your painted keepsake box by applying a clear protective varnish or sealant. This will protect your artwork from wear and tear, giving it a durable and beautiful finish. Allow the varnish to cure completely before using your new decorative box. There are various types of varnishes available, including matte, satin, and gloss. Choose one that complements the aesthetic of your folk art design. For example, a matte finish can give an aged, rustic look, while a gloss finish provides a vibrant shine. Always apply varnish in a well-ventilated area and follow the manufacturer’s instructions for drying times. This final step is crucial to preserve your beautiful work for years to come. Ultimately, a well-sealed box will withstand daily use.
Beyond the Basics: Enhancing Your Keepsake Box
Once you’ve mastered the basic steps to paint keepsake box, consider exploring advanced techniques. For instance, you could incorporate different textures using various acrylic paint mediums. Unlocking new effects with acrylic paint mediums can add unique dimensions to your folk art. Furthermore, experimenting with gold or silver leaf accents can elevate the elegance of your design. Many artists also enjoy adding small embellishments like beads or ribbons once the paint and varnish are completely dry. Remember, the goal is to create a piece that truly reflects your personal style and creativity. Take your time and enjoy the process of making something truly unique.
Choosing the Right Materials to Paint Keepsake Box
Selecting quality materials is paramount when you decide to paint keepsake box. Good quality acrylic paints offer vibrant colors and excellent coverage. Moreover, investing in a variety of brush sizes will allow you to execute both broad strokes and fine details with precision. Don’t forget a reliable palette for mixing colors and a water container for cleaning brushes. For sanding, fine-grit sandpaper is essential. A tack cloth ensures a dust-free surface, which is critical for paint adhesion. Furthermore, a good quality clear varnish will protect your finished artwork. While it might be tempting to opt for cheaper alternatives, better materials often lead to a more satisfying creative process and a more durable end product. Always read product reviews before making a purchase.
Inspiration for Your Folk Art Keepsake Box Designs
Folk art is incredibly diverse, offering a wealth of inspiration for your keepsake box. Consider traditional motifs from different cultures, such as Scandinavian Rosemaling, Pennsylvania Dutch hex signs, or Mexican Talavera patterns. For example, learning Mastering Rosemaling Strokes can provide a beautiful foundation for your designs. You can also draw inspiration from nature, incorporating local flora and fauna into your artwork. Think about the recipient of the box; their favorite colors or interests can guide your design choices. Alternatively, create a design that tells a story or symbolizes something meaningful to you. The beauty of folk art lies in its simplicity and heartfelt expression. Therefore, let your imagination be your guide as you paint keepsake box.
Common Challenges and Solutions When You Paint Keepsake Box
Even experienced artists encounter challenges. One common issue is paint bleeding under stencils. To prevent this, apply a thin coat of your base color over the stencil edges first, then paint your desired color. Another challenge can be achieving smooth brushstrokes. This often comes with practice and ensuring your paint consistency is just right – not too thick, not too watery. If you make a mistake, don’t despair! Many errors can be fixed by gently scraping off wet paint or carefully painting over dried mistakes. Common decorative painting blunders and how to fix them can provide further guidance. Moreover, patience is key throughout the entire process. Remember, every project is a learning opportunity, helping you to refine your techniques for the next time you paint keepsake box.
Maintaining Your Beautifully Painted Keepsake Box
Once your keepsake box is complete and fully cured, proper care will ensure its longevity. Avoid exposing it to extreme temperatures or direct sunlight for prolonged periods, as this can cause the paint to fade or crack. Clean your box gently with a soft, dry cloth. If it needs a more thorough cleaning, a slightly damp cloth can be used, but avoid harsh chemicals or abrasive cleaners. Periodically, you might consider reapplying a thin coat of varnish if the original finish starts to look dull or worn. This simple maintenance will keep your beautifully painted keepsake box looking fresh and vibrant for many years, preserving the artistic effort you put into it. Consequently, your handmade treasure will remain a cherished item.
The Joy of Creating a Personalized Keepsake Box
Creating a personalized keepsake box is more than just a craft project; it’s an opportunity for self-expression and mindful creation. The process of transforming a plain object into something beautiful and meaningful is deeply satisfying. Whether you’re making it for yourself or as a gift for a loved one, the thought and effort put into a hand-painted box are truly appreciated. This project allows you to slow down, focus on details, and enjoy the therapeutic benefits of painting. Ultimately, the finished box will hold not only cherished items but also the memories of its creation. Therefore, embrace the journey as you paint keepsake box and enjoy the artistic process. The act of creation itself is a reward. Moreover, sharing your creations with others can be incredibly fulfilling, perhaps even inspiring them to try their hand at decorative painting. Consider joining a decorative painting community to share your work and gain inspiration.
In conclusion, learning to paint keepsake box is a rewarding endeavor that combines creativity with practicality. From preparing your wooden surface to applying the final protective coat, each step offers a chance to infuse your personal style and artistic vision. We encourage you to experiment with colors, designs, and techniques, allowing your imagination to lead the way. The result will be a unique, handcrafted item that not only stores treasures but also becomes a treasured piece of art itself. Happy painting!
FAQ:
What kind of paint should I use for decorating a wooden box?
Acrylic paints are generally recommended for decorating wooden boxes. They are versatile, water-based, and come in a wide range of colors. They also dry quickly and offer good coverage. For best results, choose artist-grade acrylics.
Do I need to prime the wooden box before painting?
While not always strictly necessary, applying a wood primer is highly recommended. It seals the wood, prevents the paint from soaking in unevenly, and provides a smooth, uniform surface for your chosen colors. This leads to a more professional and durable finish.
How can I make my painted treasure box last longer?
To make your decorative box last, always apply a clear protective varnish or sealant once the paint is completely dry. This protects the artwork from scratches, moisture, and UV damage. Additionally, keep the box away from direct sunlight and extreme temperatures.
What are some popular folk art designs for a painted storage box?
Popular folk art designs include simple floral motifs, leaves, hearts, birds, geometric patterns, and stylized animals. You can also look into specific cultural folk art styles like Rosemaling or Pennsylvania Dutch designs for inspiration. The key is often simplicity and bold, expressive lines.
Can I use stencils to decorate my wooden box?
Yes, stencils are an excellent way to add consistent and intricate designs to your wooden box, especially if you’re new to freehand painting. Be sure to secure the stencil firmly and apply paint in thin layers to prevent bleeding under the edges.