
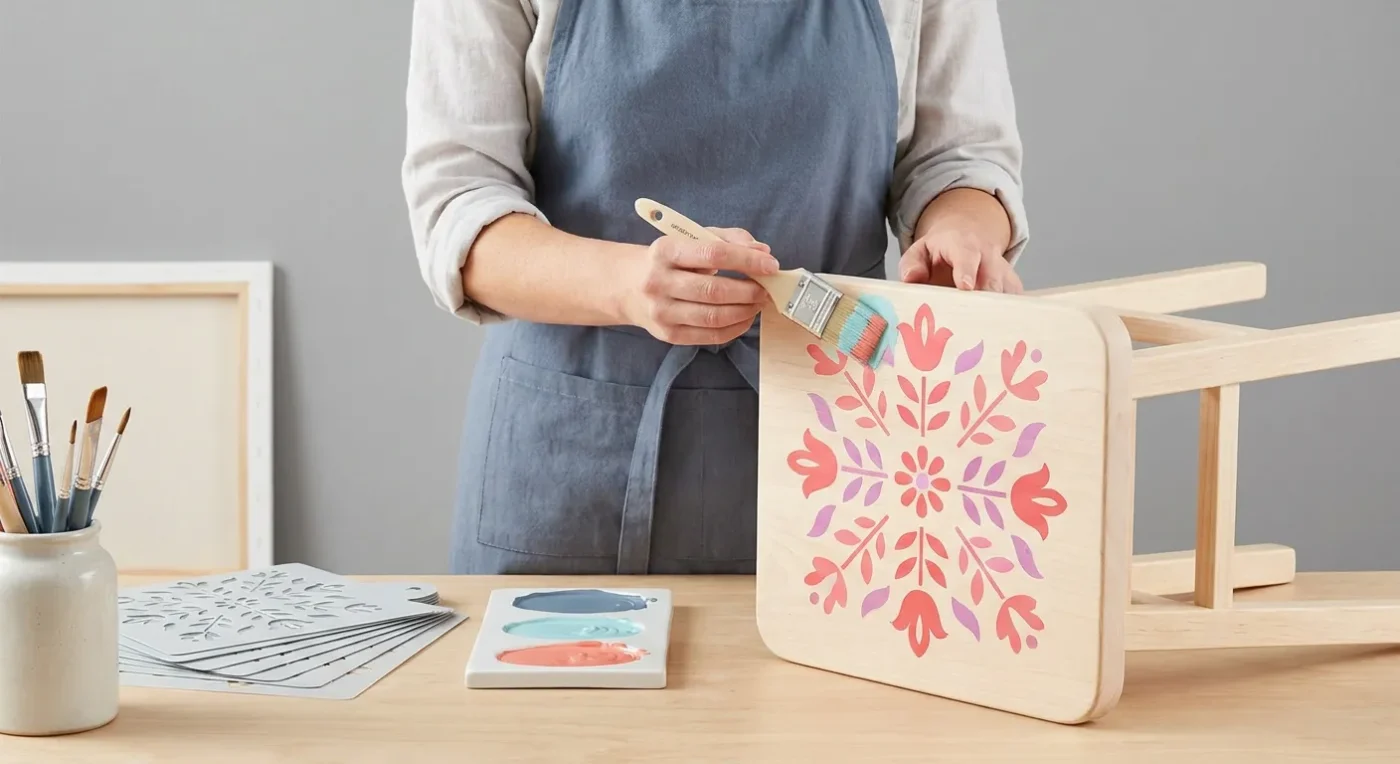

Stenciling is a fantastic technique that allows decorative painters to add intricate details, repeating patterns, and consistent motifs with precision and ease. For folk art, stenciling folk art elements can elevate your designs, providing a polished look that might be challenging to achieve freehand. This guide will walk you through simple stenciling techniques to enhance your projects, from crisp lines to delicate embellishments. Learning these methods will significantly expand your decorative painting repertoire, enabling you to create stunning, professional-looking pieces with confidence.
Essential Stenciling Tools and Preparation
Before you dive into stenciling folk art, gather your essential tools. First, high-quality stencils are crucial; reusable Mylar stencils, for instance, are durable and offer excellent longevity. Additionally, you will need painter’s tape or stencil adhesive to secure the stencil firmly in place. A good stencil brush, characterized by its short, stiff bristles, is ideal for paint application. Finally, have your chosen paints ready; acrylics work wonderfully for most folk art projects.
Proper preparation is, in fact, key to achieving outstanding results. Ensure your painting surface is clean, dry, and fully cured if it has a base coat. This initial step prevents any imperfections from transferring to your stenciled design. Next, position your stencil precisely where you want the design to appear. You can use painter’s tape around the edges to prevent shifting, or apply a light mist of temporary stencil adhesive to the back for a tighter seal. This crucial step prevents paint from bleeding under the stencil, thereby ensuring sharp, clean lines.
Choosing the Right Stencils for Folk Art
Selecting the appropriate stencil designs is paramount for enhancing your folk art projects. Look for stencils featuring traditional folk motifs such as flowers, leaves, birds, or geometric patterns. These designs naturally complement the aesthetic of folk art painting. Consider the scale of your project; larger stencils suit bigger pieces, while smaller, more intricate designs are perfect for adding delicate accents. Furthermore, ensure the stencil material is robust enough to withstand repeated use and cleaning, which makes Mylar a popular choice among artists.
Application Techniques for Crisp Results
When applying paint through a stencil, less is definitely more. Load your stencil brush sparingly with paint, dabbing off any excess onto a paper towel. This ‘dry brush’ method is crucial for preventing bleed-through, which is a common issue for beginners. Instead of brushing, use a dabbing or stippling motion straight down onto the stencil opening. This technique ensures that the paint is pushed onto the surface rather than under the stencil edges. For very fine details, you can also use a small sponge or even a cotton swab, allowing for greater precision.
Apply multiple thin coats rather than one thick one. Allow each layer to dry slightly before adding the next. This layering approach builds color gradually and further minimizes the risk of paint bleeding. Once you’re satisfied with the coverage, carefully peel back the stencil while the paint is still slightly damp (but not wet) to reveal a clean, crisp design. Promptly clean your stencils immediately after use with warm, soapy water to prolong their life and maintain their effectiveness for future projects.
Mastering the Dry Brush Method
The dry brush method is perhaps the most important technique for successful stencil work. To elaborate, after loading your brush with paint, thoroughly blot it on a paper towel until almost no paint comes off when you dab it. This ensures that only a minimal amount of pigment reaches the stencil. Consequently, this prevents seepage under the stencil’s edges, which often ruins the crispness of the design. Practice this technique on a scrap piece before moving to your main project, building confidence and control.
Adding Depth and Dimension with Stenciling
Stenciling folk art doesn’t just mean flat patterns; you can also add depth and dimension to your designs. For example, use different shades of the same color to create a gradient effect within a stenciled area. Begin with a lighter shade at one end and gradually transition to a darker shade. Additionally, consider using metallic paints or glazes over stenciled patterns to add subtle shimmer and visual interest. This technique can make specific elements pop, providing a richer, more complex appearance. Another approach involves layering stencils. By using two or more complementary stencils, you can build up intricate scenes or patterns, adding texture and visual depth to your folk art pieces. For inspiration, explore Where to Find Folk Art Inspiration: Everyday Discoveries.
Layering Stencils for Complex Designs
Layering stencils is an advanced technique that yields stunning, complex designs. First, apply your base stencil design using a single color. Once dry, carefully position a second, complementary stencil over a portion of the first design. Use a different color or a slightly darker shade to create contrast. This method allows for the creation of intricate patterns that appear multi-dimensional. For instance, you could stencil a floral outline first, then layer a smaller detail stencil within the flower petals. Precision in registration is key when layering, so take your time to align each stencil perfectly.
Common Stenciling Challenges and Solutions
Even experienced artists encounter challenges when working with stencils. One common issue is paint bleeding under the stencil. As discussed, using a dry brush technique and securing the stencil firmly are the best preventative measures. If bleeding still occurs, it might be due to too much paint on the brush or an uneven surface. Another challenge is achieving consistent coverage, especially on textured surfaces. In such cases, a foam pouncer or a dauber might provide better results than a brush, as they conform more easily to uneven textures. Furthermore, sometimes the stencil lifts prematurely, causing smudges. Always wait for the paint to be tacky, but not fully dry, before carefully removing the stencil. If you encounter difficulties with color choices, remember that understanding Crafting Vibrant Hues: Understanding Folk Art Color Palettes can greatly assist your decorative painting.
Troubleshooting Bleed-Through
Bleed-through is undoubtedly the most frustrating problem when stenciling. To address this, first, re-evaluate your paint consistency. If it’s too thin, it will naturally seep. Consider thickening it slightly with a medium if possible. Second, ensure your stencil adhesive or tape is creating a tight seal around all edges. If there are gaps, paint will find its way underneath. Third, and most importantly, truly master the dry brush technique. Blot, blot, and blot your brush again. A nearly dry brush will deposit pigment without the liquid content that causes bleeding. Finally, apply paint in several very light, almost transparent, layers rather than one heavy application. This method allows each layer to dry, preventing accumulation that could lead to seepage.
Integrating Stenciling into Broader Folk Art Projects
Incorporating stenciling folk art elements can significantly enhance the overall appeal of larger projects. Consider using stencils for borders on trays, decorative boxes, or furniture pieces. They provide a cohesive and professional finish that ties the whole design together. For instance, you might hand-paint a central folk art motif and then use stencils to create intricate corner details or a repeating pattern along the edges. This combination of freehand and stenciled work often creates a dynamic and visually appealing contrast. Moreover, stenciled backgrounds can provide an interesting texture or pattern upon which you can then paint additional freehand details. This approach adds complexity without requiring extensive freehand skill for every element. For example, a simple checkered stencil background could be the perfect canvas for your whimsical folk art animals. Furthermore, stenciling can be used to add lettering or numbers to signs or plaques, ensuring a neat and legible presentation.
Combining Freehand and Stenciled Elements
The synergy between freehand painting and stenciled elements is a hallmark of sophisticated decorative art. Begin by identifying which parts of your design would benefit most from the precision of a stencil. For instance, a repetitive border or a complex geometric pattern is ideal for stenciling. Conversely, organic shapes, whimsical figures, or personalized details are often best executed freehand. By combining these two approaches, you can achieve a harmonious balance of accuracy and artistic expression. This method also allows you to focus your freehand efforts on the most impactful parts of your piece, while still maintaining a polished overall look. Remember, the goal is to enhance, not to overshadow, the unique charm of folk art.
Maintaining Your Stencils and Tools
Proper care and maintenance of your stencils and tools are essential for their longevity and continued performance. As soon as you finish a project, clean your stencils. Warm, soapy water is usually sufficient for acrylic paints. Lay them flat to dry or hang them to prevent warping. Avoid abrasive cleaners or scrubbing brushes that could damage the stencil material. Similarly, clean your stencil brushes immediately after use. Rinse them thoroughly and reshape the bristles before allowing them to air dry. Store stencils flat in a folder or hang them to prevent bending or creasing. Well-maintained tools ensure crisp lines and beautiful results every time you engage in stenciling folk art. Proper storage also helps you quickly find the right stencil for your next project, saving time and frustration. For more information on general painting terms, consult our Glossary of Terms.
Cleaning and Storing Stencils
Cleaning stencils promptly after use is critical. If paint dries on the stencil, it can become much harder to remove and may damage the fine details. For acrylics, a quick rinse under warm water with a mild dish soap is usually sufficient. Gently rub any remaining paint with your fingers or a soft brush. Avoid harsh chemicals as they can degrade the stencil material. Once clean, lay the stencil flat on a towel or hang it to dry completely. For storage, flat is best. Use a large binder with sheet protectors, or a dedicated stencil storage box. This prevents bending and keeps your stencils organized and ready for your next creative endeavor. Storing them properly will extend their life for many years of beautiful decorative painting.
Advanced Tips for Stenciling Enthusiasts
For those looking to take their stenciling folk art skills to the next level, consider experimenting with shading. Use a very light touch with a slightly darker color around the edges of a stenciled element to create a subtle shadow effect. This adds remarkable realism and depth. Another advanced technique involves using multiple colors within a single stencil opening. Apply one color to a section, then carefully mask it off and apply a different color to another section. This requires patience and precision but yields stunning, multi-toned results. Furthermore, don’t be afraid to create your own custom stencils from Mylar sheets using a craft knife. This allows for truly unique and personalized designs, perfectly tailored to your folk art vision. You can also explore texture pastes or modeling compounds through stencils for raised designs, adding a tactile dimension to your work. A great resource for various art supplies and techniques can be found at Dick Blick Art Materials, offering a wide array of tools and materials for your creative journey. Another excellent resource for learning new decorative painting techniques is The Society of Decorative Painters, which provides educational content and community support.
Creating Custom Stencils
Designing and cutting your own stencils is a rewarding way to personalize your folk art. Start by sketching your desired motif on paper. Then, transfer this design to a sheet of Mylar stencil material. Using a sharp craft knife or a dedicated stencil cutting tool, carefully cut out the negative spaces. Remember to leave adequate ‘bridges’ to connect the parts of your design, ensuring the stencil remains cohesive. This process allows for complete creative freedom, letting you replicate unique family emblems, specific botanical elements, or abstract patterns that perfectly fit your project. Custom stencils are invaluable for truly individualizing your decorative work.
Conclusion
Incorporating stenciling folk art into your creative process offers a reliable way to add professional-looking details and patterns. With these simple yet effective techniques, you can achieve impressive precision and expand your decorative painting repertoire with confidence. From selecting the right tools and preparing your surface to mastering application methods and troubleshooting common issues, you now have a comprehensive guide to elevate your folk art projects. Remember, practice is key, and each stenciled piece will build your skill and artistic vision. Embrace the versatility of stenciling to bring crisp lines, delicate embellishments, and unique dimensions to your beautiful creations. Happy painting!
FAQ
How can I prevent paint from bleeding under my stencils?
To prevent paint bleed, ensure your stencil is securely adhered to the surface using painter’s tape or temporary spray adhesive. Additionally, use a ‘dry brush’ technique, loading very little paint onto your brush and dabbing off excess onto a paper towel before applying. Apply multiple thin coats instead of one thick layer.
What kind of paint is best for decorative stencil work?
Acrylic paints are generally the best choice for decorative stencil work. They dry quickly, offer good coverage, and are easy to clean up. For specific effects, you might also consider fabric paints for textiles or specialty stencil creams for raised textures.
How do I clean my stencils after use?
Clean your stencils immediately after use. For acrylics, warm, soapy water is usually sufficient. Gently rub any remaining paint with your fingers or a soft brush. Avoid harsh scrubbing. Lay the stencils flat or hang them to dry completely to prevent warping.
Can I use stencils on curved surfaces?
Using stencils on curved surfaces can be challenging but is possible. Look for flexible Mylar stencils, and use temporary stencil adhesive for a tighter grip. Apply paint with a very dry brush and a dabbing motion. Sometimes, cutting the stencil into smaller, manageable sections can help it conform better to the curve.
What are some ways to add dimension to stenciled designs?
To add dimension, you can use shading by applying slightly darker paint around the edges of your design. Layering different stencils or using multiple colors within a single stencil opening can also create depth. Experiment with texture pastes applied through stencils for raised, tactile effects.