
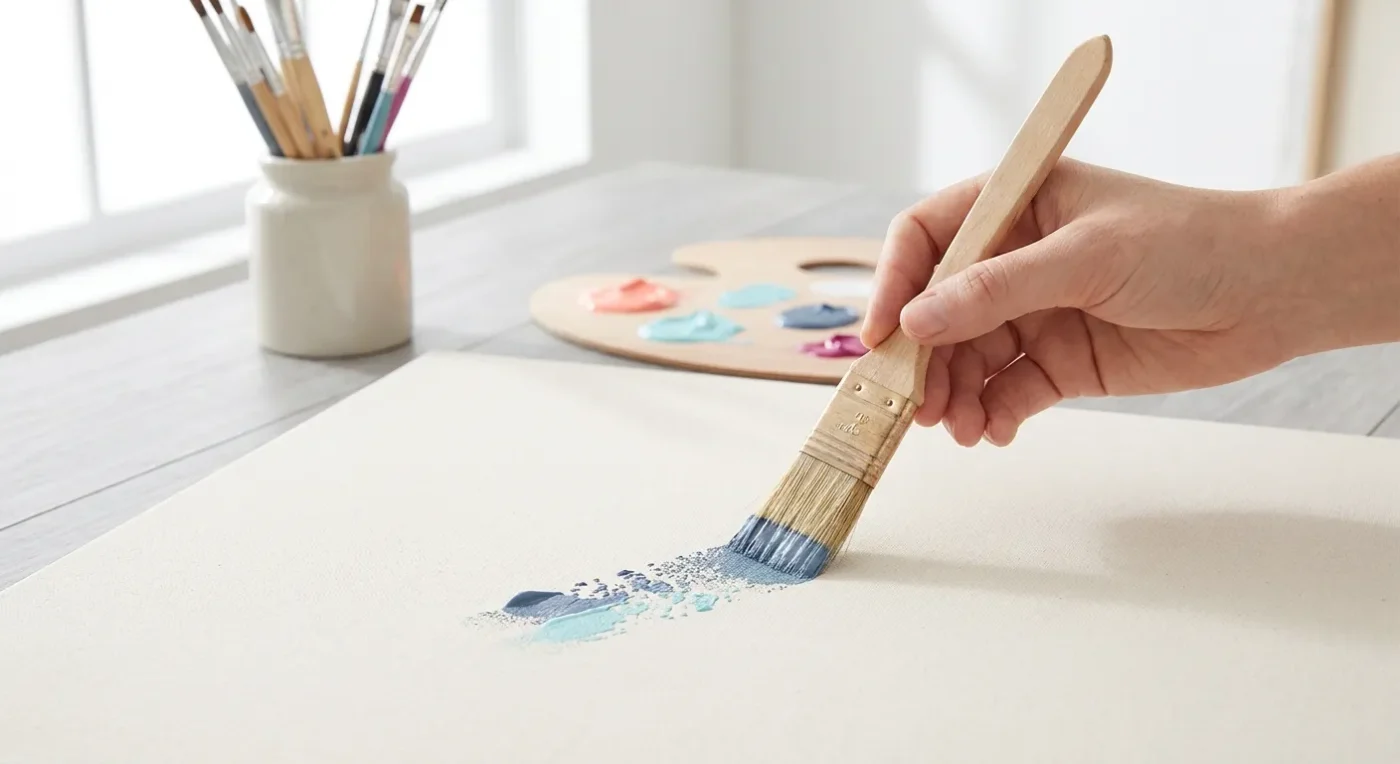

In the world of decorative arts, texture can transform a flat surface into a captivating visual experience. The dry brush painting technique is a powerful tool for achieving just that—adding rugged textures, soft blends, and a sense of age or dimension to your artwork. Far from requiring a lot of paint, this method relies on minimal moisture and a specific brush application to create unique effects. If you’ve been looking for a way to add character and depth to your folk art, craft projects, or even fine art pieces, the dry brush method is an essential skill to learn. We will explore the nuances of this technique, providing practical advice to enhance your painting journey.
What is Dry Brushing and Why Use It?
Dry brushing involves using a brush with very little paint on its bristles, typically applied to a dry surface. Instead of smooth, even coverage, this technique creates broken, streaky, or stippled marks where the paint only catches the raised portions of the surface or previous layers. This makes it ideal for:
- Creating Texture: Mimicking wood grain, stone, fabric, or weathered surfaces.
- Highlighting: Adding subtle highlights to textured areas.
- Soft Blending: Achieving gentle transitions between colors without harsh lines.
- Aged Effects: Giving a vintage or distressed look to objects and paintings.
- Adding Dimension: Building up layers of color that appear to recede or advance.
Moreover, this technique is incredibly forgiving. Artists of all skill levels can achieve impressive results with just a little practice. It adds a handmade touch that is highly valued in folk art and decorative painting. Therefore, understanding its applications will greatly expand your creative repertoire.
Essential Materials for Textured Effects
To effectively utilize the drybrush art technique, you’ll need a few key items. Selecting the right tools can make a significant difference in the outcome of your project. Consider these essentials before you begin.
- Bristle Brushes: Stiff, natural bristle brushes (flat, round, or filbert) work best. Their rough texture helps lift and deposit paint unevenly. For a comprehensive guide on selecting brushes, you might find our article on The Essential Brush Kit for Folk Art Home Decor Projects helpful.
- Acrylic or Oil Paints: Both work well. Acrylics dry faster, making layering quicker. Oils offer more blending time.
- Paper Towels or a Rag: Crucial for removing excess paint from your brush.
- A Practice Surface: Cardboard, scrap wood, or canvas to experiment before applying to your main project.
- Your Project Surface: Wood, canvas, ceramic, metal – the technique is versatile.
Furthermore, ensure your workspace is well-lit and comfortable. Proper preparation sets the stage for successful painting. Having all your materials ready beforehand streamlines the creative process.
Step-by-Step Dry Brush Painting Technique Application
Follow these steps to achieve beautiful dry brush effects. This methodical approach will guide you through each stage, ensuring you master the dry brush painting technique with confidence.
- Load Your Brush Sparingly: Dip just the tip of your brush into your chosen paint color. Do not overload it. A small amount goes a long way with this method.
- Remove Excess Paint: This is the most critical step. Firmly wipe almost all the paint off your brush onto a paper towel or rag. You want the bristles to feel almost dry, leaving only a small amount of pigment. Test it on your practice surface; if it makes a solid line, you have too much paint. This step ensures you create those characteristic broken strokes.
- Apply to Surface: Using light, quick strokes, drag or dab your brush across your project surface. You can use straight strokes, circular motions, or stippling (tapping) depending on the desired effect. The key is to let the bristles skim the surface, catching only the high points. Consequently, this creates the textured appearance.
- Layer Colors: For more depth, allow the first layer to dry, then apply another layer with a different, often lighter, color. This layering technique builds complexity and richness. For example, you might add a lighter shade over a darker base to simulate highlights. This method is similar to advanced folk art color blending techniques, which you can read more about in our guide on Elevating Your Art: Advanced Folk Art Color Blending Techniques for Depth.
- Build Intensity: Repeat the application process, gradually adding more layers or pressure until you achieve the desired intensity and texture. Remember, it’s easier to add more paint than to remove it. Therefore, start light and build up gradually.
Tips for Mastering the Dry Brush Painting Technique
Achieving proficiency in any art form requires practice and understanding specific nuances. Here are additional tips to refine your dry brushing skills.
- Control Your Pressure: Light pressure creates subtle textures, while slightly more pressure will deposit more paint and create bolder marks. Experiment on your practice surface to find the right balance for your project.
- Brush Angle Matters: Holding your brush at a shallow angle to the surface will allow only the tips of the bristles to make contact, resulting in finer, more delicate textures. A more upright angle will create broader strokes.
- Work in Layers: As mentioned, layering is crucial. Build up your textures and colors gradually. This approach adds depth and realism to your work.
- Embrace Imperfection: The beauty of the dry brush painting technique often lies in its imperfect, organic nature. Don’t strive for perfect uniformity; instead, appreciate the unique character each stroke creates.
- Clean Your Brush Regularly: Even with minimal paint, bristles can accumulate pigment. Wipe your brush periodically to maintain consistent effects and prevent accidental heavy applications.
Understanding these subtleties will help you apply the dry brush painting technique with greater precision and artistry. Many artists find that experimenting with different brushes and paint consistencies also yields surprising results. Always remember that creativity flourishes with exploration.
Creative Applications of the Dry Brush Technique in Decorative Arts
The versatility of the dry brush painting technique makes it a favorite among decorative artists. It can be applied across a wide array of projects, bringing unique character to each one. Let’s explore some specific ways you can incorporate this technique into your work.
Adding Weathered Effects to Wood
Imagine transforming a plain wooden surface into something with the charm of aged timber. The dry brush method is perfect for this. Apply a base coat, then use a lighter, contrasting color with a dry brush to skim across the surface. This highlights the wood grain and imperfections, creating a beautifully distressed look. For instance, you can make new furniture appear like cherished antiques. This technique is often used in folk art to create rustic finishes.
Creating Realistic Stone and Rock Textures
When painting natural elements like stones or rocks, the dry brush technique excels. Start with a darker base color. Once dry, use various shades of grey, brown, or even subtle greens and blues with a dry brush. Lightly drag the brush over the surface, focusing on the raised areas. This builds up a convincing illusion of rough, natural stone. This method is far more effective than trying to paint every detail individually.
Enhancing Fabric and Textile Paintings
For those interested in painting on fabric, dry brushing can add wonderful texture to clothing, banners, or decorative items. It helps simulate the weave of the fabric or create a faded, vintage appearance. After applying a base color, use a lighter shade with a dry brush to create highlights or worn areas. This technique works particularly well for projects where a soft, blended effect is desired. Explore more ideas for Painting on Fabric to combine with this method.
Giving Dimension to Folk Art Details
In folk art, adding dimension without heavy impasto can be tricky. The dry brush painting technique provides a solution. For example, when painting a basket, use a slightly lighter color with a dry brush over the woven texture to make it appear more three-dimensional. Similarly, for painted flowers, a light dry brush stroke on the petal edges can make them pop. This subtle addition significantly enhances the visual appeal of your artwork. Consider how this could apply to Folk Art Coasters or other small decorative items.
Achieving Soft Blends for Skies and Backgrounds
While often associated with texture, dry brushing can also create incredibly soft, ethereal blends. For skies or backgrounds, apply a base color. Then, with a very dry brush and a slightly different hue, lightly brush over the area in circular motions. This creates a gentle transition between colors, avoiding harsh lines and producing a dreamy effect. This is particularly useful when you want a background that doesn’t distract from your main subject but still adds depth.
The creative possibilities with the dry brush painting technique are truly vast. By experimenting with different colors, pressures, and brush types, you will discover countless ways to incorporate this method into your decorative painting projects. It’s a technique that encourages playful exploration and yields consistently satisfying results. Remember, the journey of learning is as rewarding as the finished piece.
Common Mistakes to Avoid When Using the Dry Brush Painting Technique
Even seasoned artists can sometimes fall into common pitfalls. Being aware of these errors can help you refine your dry brush painting technique and achieve better outcomes. Avoiding these mistakes will save you time and frustration, leading to more successful projects.
- Too Much Paint on the Brush: This is the most frequent mistake. If your brush is too wet, you won’t get the broken, textured effect; instead, you’ll get a solid stroke. Always wipe off more paint than you think you need.
- Too Much Pressure: Applying too much pressure forces paint into all the crevices of your surface, negating the dry brush effect. Use a light, skimming touch.
- Using the Wrong Brush: Soft brushes don’t work well for dry brushing. Their bristles bend too easily and don’t effectively catch the high points of a surface. Always opt for stiff, natural bristle brushes.
- Not Allowing Layers to Dry: If you apply a new dry brush layer over a wet one, the colors will blend too much, losing the distinct textured effect. Patience is key; let each layer dry thoroughly.
- Lack of Practice: The dry brush painting technique, like any skill, improves with practice. Don’t expect perfection on your first try. Use a scrap piece to experiment before working on your main project.
By keeping these points in mind, you can significantly improve your application of the dry brush painting technique. Learning from common errors is a valuable part of the artistic process. For more general advice on fixing painting mistakes, you can consult our guide on Common Decorative Painting Blunders and How to Fix Them.
Expanding Your Skills: Beyond Basic Dry Brushing
Once you are comfortable with the fundamental dry brush painting technique, there are many ways to expand its application and integrate it with other methods. This can lead to even more complex and visually rich artwork.
Combining with Stenciling
Dry brushing is an excellent companion to stenciling. After positioning your stencil, use a dry brush to lightly dab paint through the openings. This creates a crisp, yet slightly textured, stenciled design. The dry brush method prevents paint from bleeding under the stencil, resulting in clean edges and a unique finish. For more on this, check out our article on Adding Detail with Decorative Painting Stencils.
Integrating with Washes and Glazes
Consider applying a thin wash of color over a dry-brushed texture. The wash will settle into the crevices, enhancing the depth and making the texture more pronounced. Alternatively, dry brush a lighter color over a darker glaze to create a subtle glow. These combinations add layers of visual interest and complexity.
Experimenting with Different Mediums
While acrylics and oils are common, don’t hesitate to try dry brushing with other paint types if your project allows. For example, some artists use very dry watercolor or gouache on textured paper for unique effects. Understanding how different mediums react to the dry brush painting technique can open up new creative avenues. For acrylic users, exploring Acrylic Paint Mediums can further enhance your dry brushing results.
Using Dry Brushing for Highlights and Shadows
Beyond creating overall texture, the dry brush method is fantastic for adding subtle highlights and defining shadows. Use a very light touch with a slightly lighter color on the highest points of your subject to create highlights. Conversely, a darker, very dry color can be gently worked into recessed areas to deepen shadows, adding significant realism to your pieces. This technique is particularly effective in portraiture or still life painting.
By exploring these advanced applications, you will find that the dry brush painting technique is not just a single method but a versatile tool in your artistic arsenal. It encourages continuous learning and experimentation, which are hallmarks of a thriving artistic practice. The more you explore, the more you will discover the endless possibilities this technique offers.
The Enduring Appeal of Textured Art
Textured art, particularly that achieved with methods like the dry brush painting technique, holds a timeless appeal. It engages viewers on a deeper level, inviting them to not just see but almost feel the artwork. The subtle variations, the play of light on raised surfaces, and the tactile quality all contribute to a richer viewing experience. This is especially true in folk art, where handcrafted textures often tell a story of tradition and craftsmanship.
Moreover, incorporating texture adds a professional finish to your projects. It elevates a simple painted surface into a piece with character and depth. Whether you are aiming for rustic charm, historical accuracy, or modern abstraction, the dry brush painting technique provides a reliable path to achieving your vision. It is a fundamental skill that, once mastered, will become an invaluable part of your decorative art toolkit. Continue to practice and explore, and you will undoubtedly create beautiful, textured masterpieces.
Ultimately, the satisfaction derived from creating something with your own hands, imbued with unique textures and character, is immense. The dry brush method empowers you to bring these visions to life. It is a journey of discovery, offering endless opportunities for creative expression. Embrace the process, and let your art speak through its texture.
Frequently Asked Questions About Dry Brushing
What kind of brush is best for dry brushing?
Stiff, natural bristle brushes are ideal for dry brushing. Flat, round, or filbert shapes work well. The firmness of the bristles helps to catch the high points of your surface and deposit paint unevenly, creating the desired textured effect. Synthetic brushes can sometimes be too soft.
Can I use this technique with watercolors?
While commonly used with acrylics and oils, you can apply dry brushing with watercolors on textured paper. The key is to use very little water with your watercolor paint, creating a thick, almost paste-like consistency. This allows the pigment to catch on the paper’s texture, producing unique grainy effects.
How do I prevent my dry brush strokes from looking too harsh?
To avoid harsh strokes, ensure your brush is truly dry of excess paint. Use very light pressure and work in multiple thin layers rather than one heavy application. You can also soften edges by gently blending with a clean, dry brush immediately after application.
What surfaces are suitable for adding texture with this method?
This method is incredibly versatile. It works well on wood, canvas, paper, ceramic, metal, and even fabric. Any surface with a slight texture or that can be built up in layers will show the dry brush effects beautifully. Experiment with different surfaces to see what results you achieve.
Is this technique good for beginners?
Absolutely! The dry brushing technique is excellent for beginners because it’s forgiving and produces satisfying results quickly. It teaches control over paint application and pressure. With a little practice on a scrap surface, new artists can easily add texture and depth to their projects.