
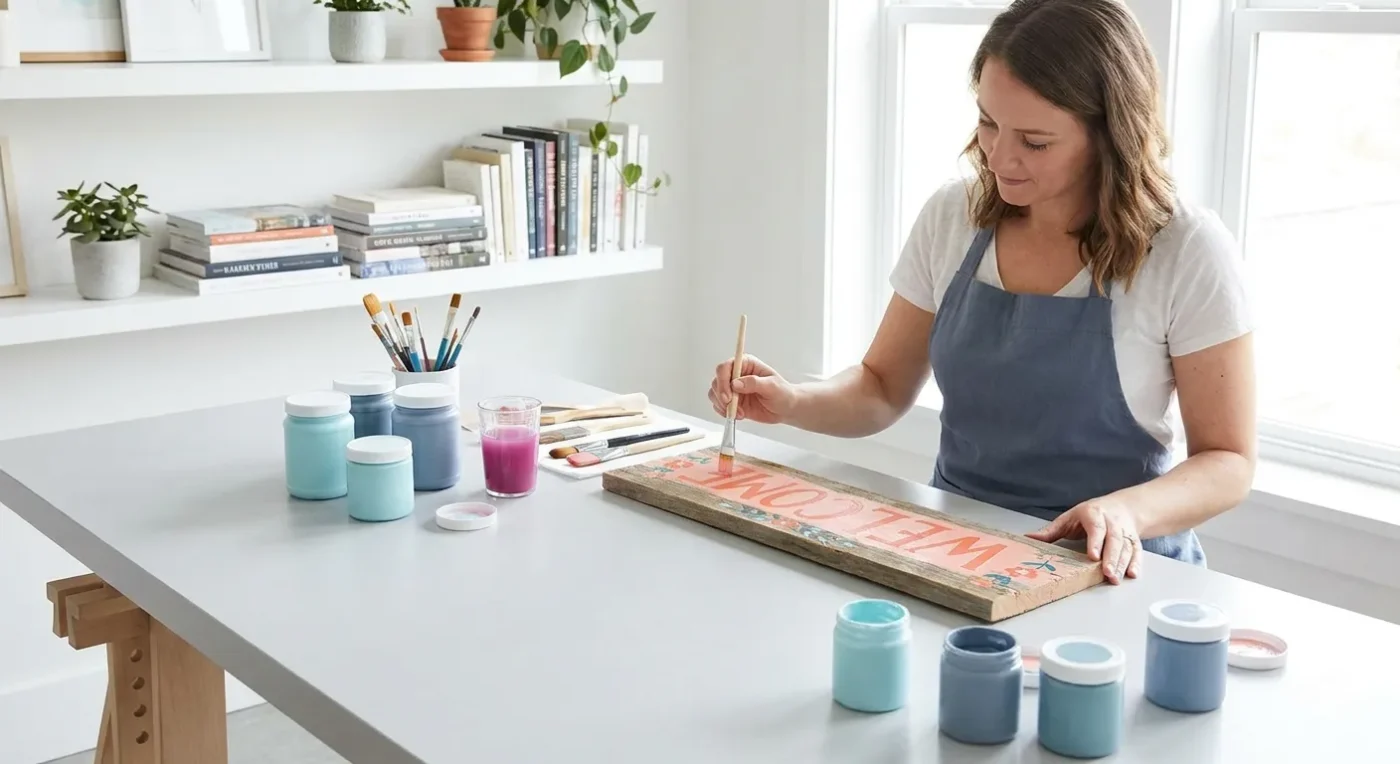

There’s nothing quite like a handmade touch to make a home feel inviting and unique. A beautifully crafted welcome sign, especially one painted with a rustic folk art flair, instantly adds warmth and personality to your entryway. This project is not only incredibly satisfying but also perfectly suited for beginners, offering a fantastic way to practice basic painting skills while creating something genuinely useful and charming. Let’s embark on a rustic welcome sign painting adventure that will leave you with a delightful piece of personalized home decor.
Why a Hand-Painted Welcome Sign?
In a world of mass-produced items, a hand-painted welcome sign truly stands out. It reflects your personal style, offers a warm greeting to guests, and can be customized to perfectly match your home’s aesthetic. Beyond its decorative appeal, creating a DIY welcome sign painting project provides a wonderful opportunity to:
- Develop Painting Skills: Practice lettering, brush control, and color blending.
- Express Creativity: Choose your own colors, fonts, and decorative elements.
- Create a Unique Gift: A handmade sign makes a thoughtful and personalized present.
- Boost Confidence: Complete a tangible project from start to finish.
Gathering Your Materials for DIY Welcome Sign Painting
Before you dip your brush, ensure you have all your supplies ready. Here’s what you’ll need for your rustic sign project:
- Wooden Board: A pre-cut wooden plank (pine, cedar, or reclaimed wood works well), ideally 12-18 inches wide and 24-36 inches long. Look for one with a rustic, slightly distressed feel.
- Acrylic Paints: A selection of colors that complement your home. Think earthy tones like deep terracotta, sage green, creamy ivory, and warm brown, or classic black and white. For more on maximizing your paints, consider Unlocking New Effects: A Guide to Acrylic Paint Mediums.
- Brushes: A flat brush for base coats, a smaller round or liner brush for lettering and details. For a comprehensive guide, check out The Essential Brush Kit for Folk Art Home Decor Projects.
- Pencil and Eraser: For sketching your design.
- Sandpaper: Fine-grit (220-grit) for light distressing.
- Painter’s Tape: To create clean lines if desired.
- Clear Sealer (Polyurethane or Varnish): To protect your finished sign, especially if it will be outdoors.
- Optional: Stencils for lettering, a ruler, a hanging kit (hooks, wire).
Inspiration for Your Folk Art Sign Project
Folk art often draws from natural elements and simple, heartfelt sentiments. For your folk art sign project, consider these ideas:
- Simple Lettering: Classic block letters, elegant script, or a whimsical hand-drawn style.
- Nature Motifs: Vines, leaves, simple flowers (like daisies or sunflowers), birds, or small insects.
- Rustic Accents: Faux wood grain, distressed edges, or a subtle border.
- Words of Welcome: Beyond ‘Welcome,’ consider ‘Hello,’ ‘Home Sweet Home,’ ‘Gather,’ or your family name.
Look at vintage signs, farmhouse decor, or online galleries for ideas. Don’t be afraid to combine elements you love. A great starting point for unique design ideas is exploring Drawing Inspiration from Historical Folk Art Patterns.
Step-by-Step Guide to Rustic Welcome Sign Painting
Now that you have your materials and inspiration, let’s get painting! Follow these steps to create your charming sign.
Step 1: Prepare Your Wooden Board
First, lightly sand your wooden board with fine-grit sandpaper. This creates a smooth surface for painting and helps the paint adhere better. Wipe away any dust with a damp cloth and allow it to dry completely. If you want a truly rustic look, you can skip some sanding to retain more natural imperfections.
Step 2: Apply a Base Coat
Next, apply a base coat of your chosen background color. A flat brush works best for this. Paint in the direction of the wood grain for a smooth finish. You might need two thin coats for opaque coverage. Allow each coat to dry thoroughly before applying the next. This foundational step is crucial for the overall appearance of your rustic welcome sign painting.
Step 3: Sketch Your Design
Once the base coat is dry, lightly sketch your lettering and any decorative elements onto the board with a pencil. Don’t press too hard; you want marks that can be easily erased or covered. If you’re using stencils, position them carefully and secure with painter’s tape. If you are new to freehand lettering, practice on scrap paper first.
Step 4: Paint the Lettering and Motifs
Now, it’s time for the fun part! Using your smaller brushes, carefully paint your letters and decorative motifs. Take your time and use steady strokes. If you’re struggling with fine details, remember that folk art often embraces a charming, slightly imperfect quality. For precise letters, consider using Adding Detail with Decorative Painting Stencils. If you make a mistake, don’t worry! You can often gently scrape off wet paint or touch up with your background color after it dries. This is a common part of the creative process.
Step 5: Add Distressing (Optional)
To enhance the rustic feel of your sign, you can add distressing. Once all the paint is dry, lightly sand the edges and corners, or even parts of the painted design, to reveal some of the wood underneath. This creates a weathered, aged look. Furthermore, you can use a dry brush technique with a darker color to add subtle shadows or faux wood grain.
Step 6: Apply a Protective Sealer
Finally, protect your beautiful work by applying a clear sealer. If your sign will be outdoors, use a sealer specifically designed for exterior use. Apply several thin coats, allowing each to dry completely according to the product instructions. This step is vital for the longevity of your hand-painted sign.
Tips for a Perfect Rustic Welcome Sign Painting
Achieving a professional-looking rustic sign is easier with a few extra tips:
- Practice Makes Perfect: Before painting on your actual sign, practice your lettering and motifs on scrap wood or paper. This builds confidence and refines your technique.
- Layering Colors: For added depth, try layering slightly different shades of the same color for your motifs. For example, paint a leaf in a darker green, then add highlights with a lighter green.
- Embrace Imperfection: Remember, folk art celebrates the handmade. Small imperfections add to the charm and unique character of your sign. Don’t strive for machine-like precision.
- Clean Your Brushes: Always clean your brushes thoroughly after each use. This preserves their quality and ensures they’re ready for your next project.
- Work in Good Lighting: Proper lighting is essential for seeing your colors accurately and maintaining detail.
- Consider the Environment: Think about where your sign will hang. If it’s exposed to the elements, choose weather-resistant paints and sealers.
Common Challenges and Solutions in Sign Painting
Even experienced painters encounter challenges. Here are some common issues you might face during your rustic welcome sign painting project and how to overcome them:
Bleeding Paint Under Stencils
If paint bleeds under your stencil, it’s often because too much paint was used or the stencil wasn’t firmly adhered. To prevent this, apply paint in thin layers, dabbing (not brushing) with a nearly dry brush or sponge. Ensure your stencil is pressed down firmly, especially around the edges. If bleeding occurs, let it dry, then carefully touch up with a fine brush and your background color. For more help with common painting issues, see Common Decorative Painting Blunders and How to Fix Them.
Uneven Lettering
Uneven lettering can be frustrating. To improve it, first ensure your initial pencil sketch is accurate. Use a ruler to guide baselines and ensure consistent letter height. When painting, take breaks to step back and assess your work. Small adjustments can be made with a fine brush. Remember, slight variations add to the handmade appeal of a folk art sign.
Achieving a Consistent Rustic Look
Sometimes, the distressed or rustic effect can look unnatural. The key is subtlety. Instead of heavy sanding in one spot, lightly sand across the entire surface. Focus on areas that would naturally show wear, like edges and corners. For an even more authentic look, consider using reclaimed wood from the start. This enhances the natural charm of your rustic welcome sign painting.
Expanding Your Folk Art Painting Skills
Once you’ve completed your welcome sign, you might find yourself inspired to explore more folk art projects. The skills you’ve gained in brush control, design transfer, and finishing techniques are transferable to a wide array of other decorative arts. For instance, you could try painting on other home decor items. Folk Art Flourishes: Painting on Eco-Friendly Home Decor for a Sustainable Home offers fantastic ideas for new surfaces. Alternatively, you might want to delve into specific styles. Mastering Rosemaling Strokes: Your Beginner’s Guide to Norwegian Folk Art provides an excellent next step for learning a traditional technique. The world of folk art is vast and welcoming, offering endless opportunities for creative expression.
Caring for Your Hand-Painted Welcome Sign
Proper care will ensure your beautiful hand-painted sign remains vibrant and welcoming for years to come. If your sign is displayed outdoors, periodically check the sealer for any signs of wear or peeling. Reapply a fresh coat of clear sealer every year or two, especially in harsh climates. For indoor signs, a light dusting with a soft cloth is usually sufficient. Avoid using harsh chemical cleaners, as these can damage the paint and sealer. By following these simple maintenance tips, your rustic welcome sign painting will continue to greet guests with charm and character.
Conclusion: A Welcoming Touch, Hand-Crafted by You
Creating a hand-painted welcome sign is a rewarding journey, transforming a simple piece of wood into a heartfelt greeting for your home. This beginner-friendly folk art project allows you to express your creativity, develop valuable painting skills, and craft a truly unique piece of decor. From selecting your materials to applying the final protective sealer, each step brings you closer to a personalized entryway that reflects your individual style. So, gather your supplies, embrace the artistic process, and enjoy the satisfaction of adding a charming, handmade touch to your home with your very own rustic welcome sign.
FAQ
What type of wood is best for a DIY welcome sign?
Pine, cedar, or reclaimed wood are excellent choices for a DIY welcome sign. They are readily available, relatively inexpensive, and often have natural grains and imperfections that enhance the rustic appeal. Ensure the wood is sanded smooth enough for painting but can retain some texture for character.
Can I use house paint instead of acrylics for my hand-painted sign?
While some house paints can be used, acrylic craft paints are generally recommended for decorative sign painting. Acrylics dry quickly, offer a wide range of colors, and are easy to clean up. If using house paint, ensure it’s suitable for exterior use if your sign will be outdoors, and consider its drying time and adhesion properties.
How do I make my painted welcome sign weather-resistant?
To make your painted welcome sign weather-resistant, use exterior-grade acrylic paints and, most importantly, apply several coats of a clear, exterior-grade polyurethane or varnish. These sealers protect the paint from UV rays, moisture, and temperature fluctuations. For added durability, consider painting all sides of the wood.
What if I’m not good at freehand lettering for my folk art sign?
Don’t worry if freehand lettering isn’t your strong suit! Many techniques can help. You can use stencils, trace printed letters using transfer paper, or even project letters onto your board and trace them. Practice on scrap material first to build confidence. Remember, the charm of a folk art sign often comes from its handmade quality, so slight imperfections are part of its character.
How can I make my painted welcome sign truly unique?
To make your painted welcome sign truly unique, personalize it with your family name, a meaningful quote, or specific motifs that reflect your interests or local flora and fauna. Experiment with different color palettes beyond traditional rustic tones, or incorporate textures using various brush strokes or even small embellishments. The goal is to reflect your personal style and create something that feels authentically yours.